DJI Osmo Nano Beginners Guide and Tutorial – Start Here
Check out the Best Deals on Amazon for DJI Drones today!
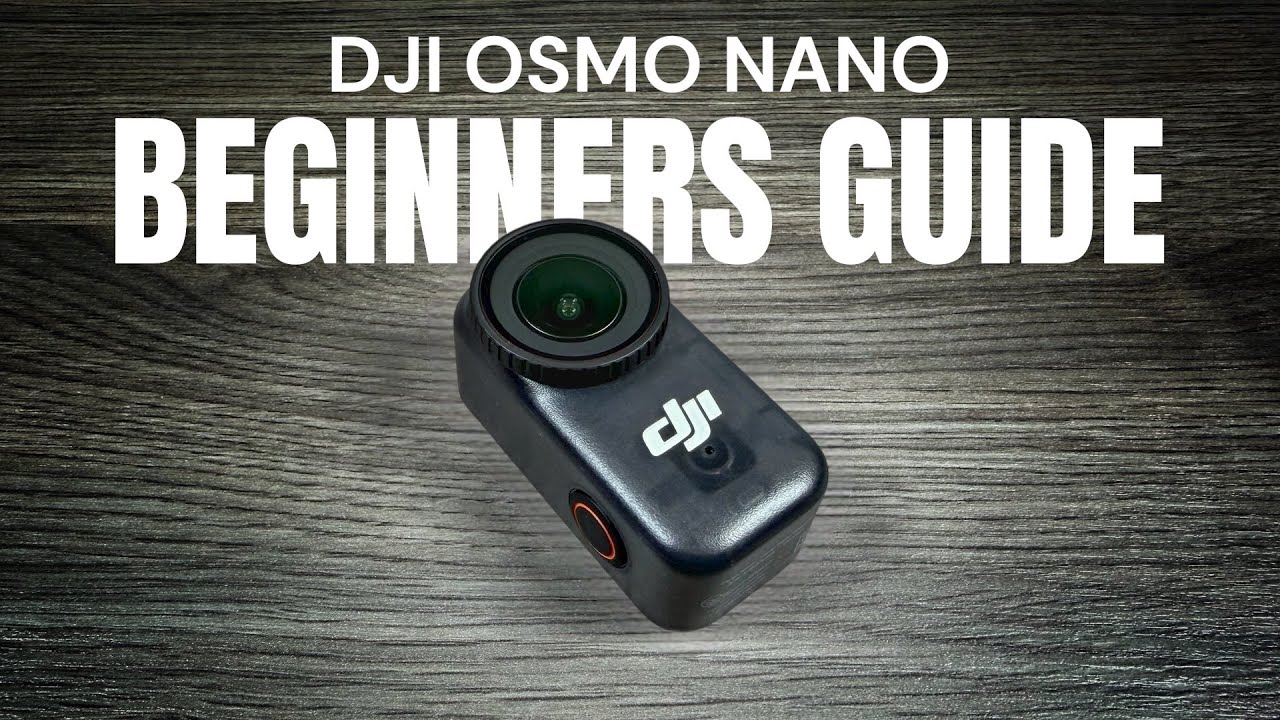
Good day, folks. Shawn here from Air Photography. This is my beginner’s guide for the brand new DJI Osmo Nano. Whenever new products like this get released, I like to create beginner’s guides to help people get familiarized with the hardware and the basic functionality of the camera. We’re going to stick to the basics in this beginner’s guide. We’re going to go over everything you need to know to get the camera running. We have to activate it, update the firmware—basically everything you need to know to get out and start capturing. With all that said, let’s jump right in and get started.
Package Options and Contents
There are going to be a couple of different packages you’ll be able to purchase, most notably the memory size. The camera module has built-in memory. You can still put a memory card in it, which we are going to talk about as we go along. Essentially, you’ll be able to purchase a version with 128 GB of storage, or you’ll be able to get one with 64 GB of storage. That’s going to be personal preference depending on your needs. As mentioned, you can expand that further with a memory card, and we will talk about that.
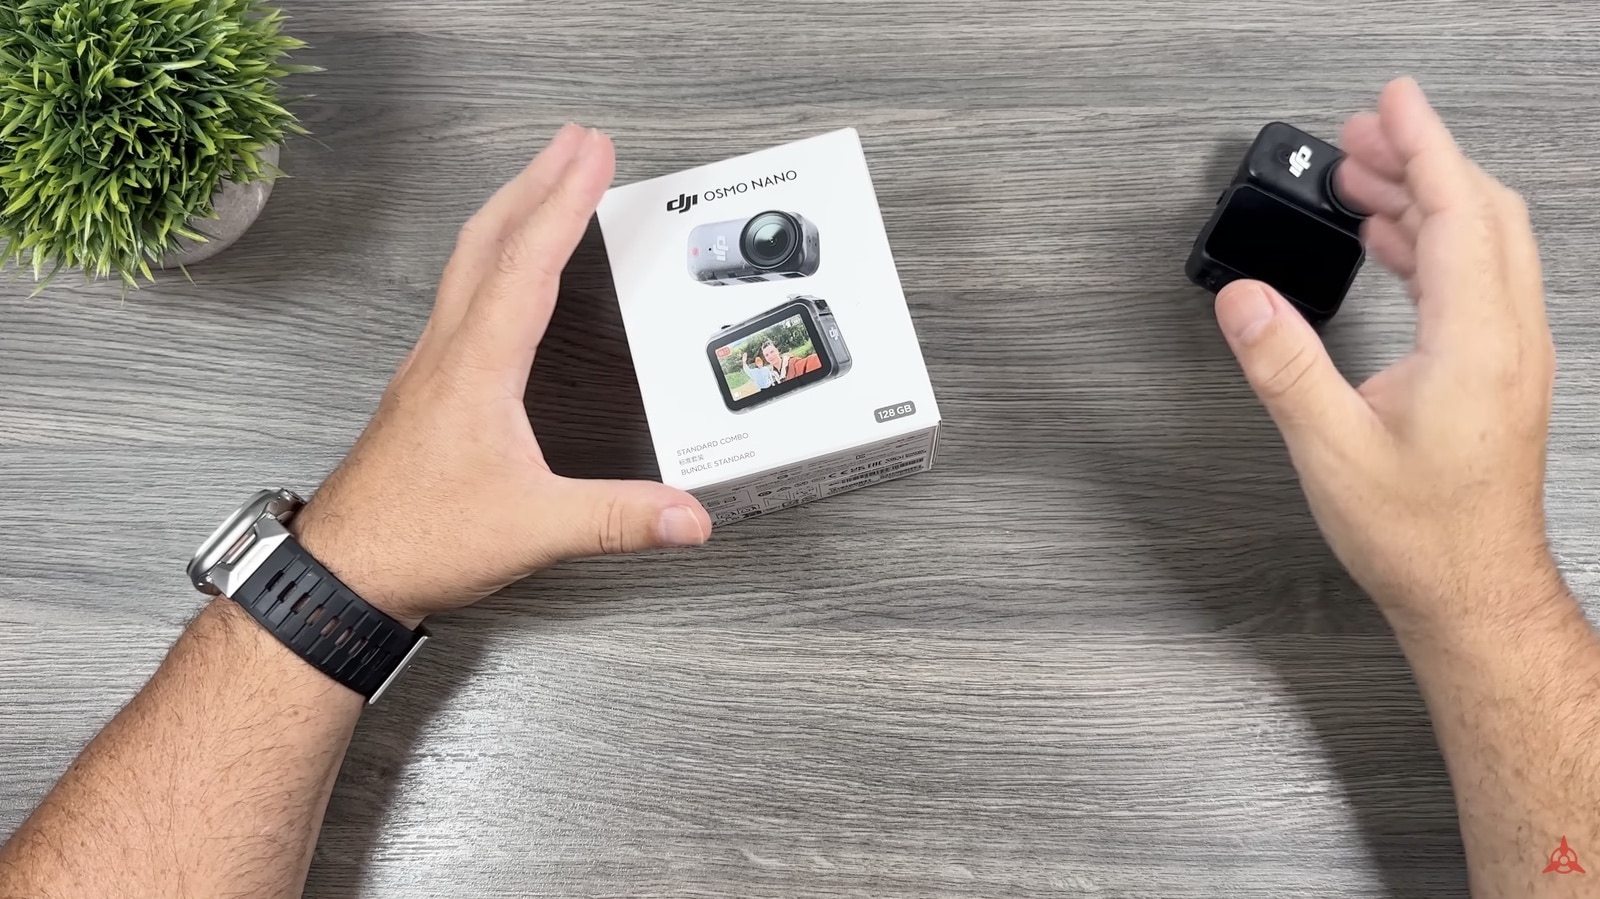
What’s in the Box
Let’s quickly go over everything that comes inside the standard combo. First, you’re going to get a little quick start guide. This has very minimal information in it—just a few things to note before you get started. DJI has a full user manual for the camera on their website, so you can go there and download it in PDF format. It has a lot of really good information in it.
It also comes with a charging and data cable. This is USB-C to USB-C. We have a magnetic pendant that allows you to mount the camera for chest-style point-of-view shots. We have a magnetic clip that can be used to mount your camera on things such as hats. It’s also magnetized on the back, so it can be used to connect to metal objects and allows you to adjust the angle of the camera. We’re going to talk a little bit about mounting coming up in a minute.
We have another magnetic mount, this one on a ball joint. It allows you to rotate the camera around and put it at unique angles depending on how you’re filming. It comes with a little mini suction cup. You can also detach it—removing it allows you to attach this to other accessories such as extension poles or any other type of mount that has a 1/4-20 thread on it.
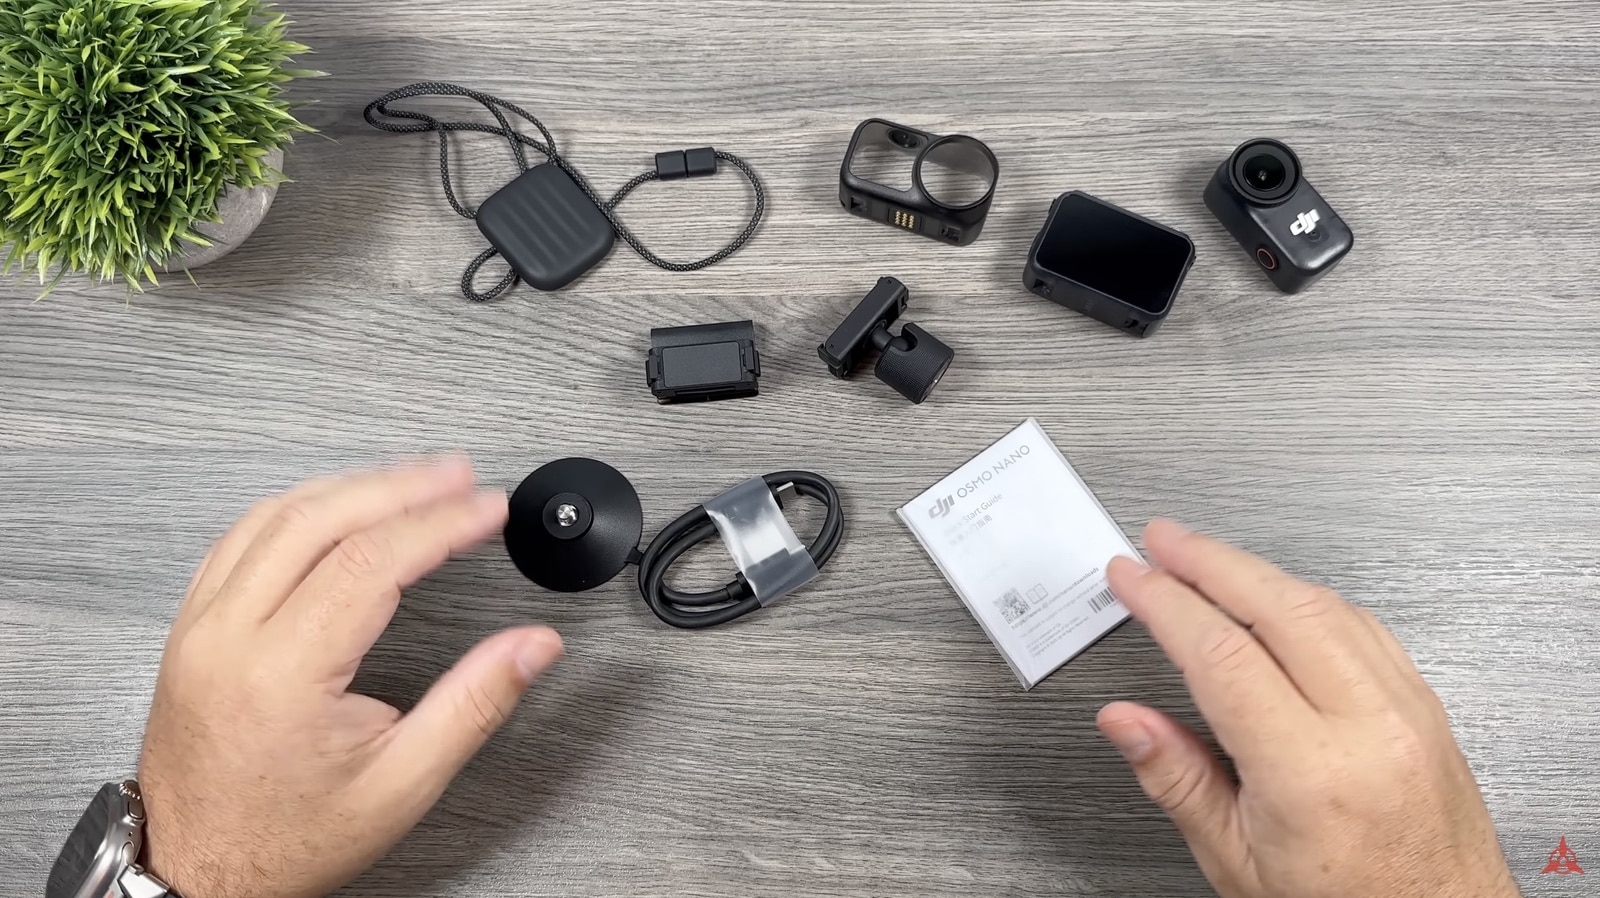
It also comes with a little protective case. Basically, you can insert the camera module into this when you’re using it independently. This can offer the camera a little extra protection if you’re going to be filming and there’s a potential of the camera taking an impact.
And then, of course, we get the camera. It comes in two parts: we have the camera module and we have the multi-functional vision dock, which can be used in a few different ways—and again, we will get into that.
Essentially, that’s what’s going to come in the package. There are going to be a lot of other accessories that are compatible with it. For example, the magnetic mounts that come with some of DJI’s other cameras, such as the Action 5 Pro or Action 4 Pro, are fully compatible with the Osmo Nano.
Camera Module and Vision Dock Overview
Let’s take a closer look at the camera and its functionality. First off, this is the camera module. You can see there’s no screen on it. We just have a shutter button at the top. At the bottom, we have our magnetic connector, and then, of course, we have the camera lens. This is removable, so if it does get damaged, you can remove it and replace it. It just twists off and you can add a replacement.
This camera, as mentioned, has built-in storage. When you’re using this camera independently all by itself, the videos and photos—everything you capture—will be stored on the internal memory.
This is the vision dock, and it can be used in a couple of different ways. If we take a look around it, we have another shutter button on the side. We have two magnetic releases—that’s how we detach it from the camera. On this side, we have a USB-C port. That’s how we charge it up, and we also have a memory card slot, which, again, we’ll talk about in a minute.
Battery and Charging
Both the camera module and the vision dock have a battery. But you’ll notice that the camera module does not have a USB-C port for charging it up. The only way to charge it is by attaching it to the vision dock. You can see when we attach them and we tap the screen, it shows us that we have 100% in the camera module and we have 85% in the vision dock.
When the multi-functional vision dock is attached to the camera, it serves several purposes. As mentioned, first of all, it’s a battery. It’ll extend the battery life and charge up the camera module. It allows us to add a memory card slot. It’s also got our display screen on it—that’s how we can get a visual preview of what we’re filming. When we have this camera mounted, it’ll help us line up the shot, and it’s also how we change our settings.
On top of that, when it’s disconnected, it can actually be used as a remote. We can still get a visual preview on the screen, which we’re going to demonstrate coming up. We can still change all our settings, and we can use the button on the side to start and stop recording when this is mounted away from us.
When it comes to attaching the camera, you can actually attach it with the screen facing you. If you’re out vlogging and you want a front-facing screen, or if you’re filming away from you, you can actually spin it around. So it can be mounted both ways.
Mounting Options
When it comes to mounting the camera, you can mount it with the vision dock attached or just the camera module itself. As you can see, we can attach a mount right to the bottom of the vision dock, or we can release the vision dock by pressing those two buttons on the side and we can mount the camera directly. So it’s very versatile in how we use it and how we mount it.
Charging Instructions
When it comes to charging, as mentioned, the only way to charge the units is through the vision dock. We’re going to use the USB-C port on the side and we’re going to use the included USB-C cable to charge it up.
One thing you’ll notice that did not come with it is a charging brick. That is something you will have to provide on your own. Most of us have USB-C chargers from cell phones and tablets, so any USB-C charger will work for the most part. I would recommend at least a 30-watt charger. If you have a faster charger like 65-watt or even 100-watt, you can use those as well.
When it comes to charging, you can charge up just the vision dock all on its own. You can see we can plug it in—it’s going to give us a percentage on the screen. Right now it’s 85-86%. So if you’re filming with this camera, you don’t actually have to have it attached to the vision dock in order to charge it up.
Of course, at any time you can attach the camera module, and when you have it plugged into USB-C, it’s going to charge both units up. As mentioned, it will give you a visual graphic right on the screen.
If you’re filming with the camera module and the battery gets low, all you have to do is attach it to the vision dock, and the vision dock is going to start charging the camera. You don’t actually have to have this plugged into power—it’s just going to transfer power from the vision dock over to the camera module. It does support quick charging, so it’s actually a fairly quick process.
Memory and Storage
We’re going to talk about memory and storage here. As mentioned, these camera modules have their own built-in storage as there is no memory card slot on them. So if you’re using this camera independently, it’s going to store to the internal memory. When using it in conjunction with the vision dock, you can actually put a memory card in it, and that’s going to expand the storage. You can put whatever size memory card you find most suitable for your needs.
Right now, I’m putting in a 256 GB card. This is a SanDisk Extreme Pro—that’s usually the brand and the card that I like to use in all my devices. When we insert it, we’re going to have the graphic facing the screen. Just slide it in and we’ll press it in until it clicks.
Because there is internal memory in it, you do not need to have a memory card in it when using it. A memory card is essentially just going to expand the storage capabilities.
Important Note About Recording to Memory
Something I do want to point out here is when you are recording video or taking photos or recording a time-lapse, all the content is going to be stored directly on the internal memory. Although we can put a memory card in the vision dock, content can’t be recorded directly to it.
So what happens when you’re out recording and you happen to fill up the internal memory? That’s when you’re going to use the transfer feature to transfer from the internal memory over to the memory card.
I also want to mention that you don’t always have to transfer the content from the internal memory over to the memory card. If you’re out filming for the day, you may have ample storage on the internal memory. When you get home, you can actually transfer the content directly from the internal memory, and I am going to be demonstrating that later in this video.
Activation and Firmware Update
Before we can use the camera, there are a couple of things that need to be done. We need to activate the camera—DJI requires these devices to be activated—and we need to update the firmware.
With most DJI cameras, it does allow you to use a camera up to five times without activating it. There’s an option on the screen that will allow you to bypass that, but I highly recommend before using it to activate it and to update the firmware. The reason being is that the firmware that comes with these when they’re shipped is quite often out of date. DJI does an incredible job fixing problems and adding new features, so it’s a good idea to make sure you’re running the latest firmware to ensure you have the full quality of the camera and all the capabilities that it’s capable of.
Using the DJI Mimo App
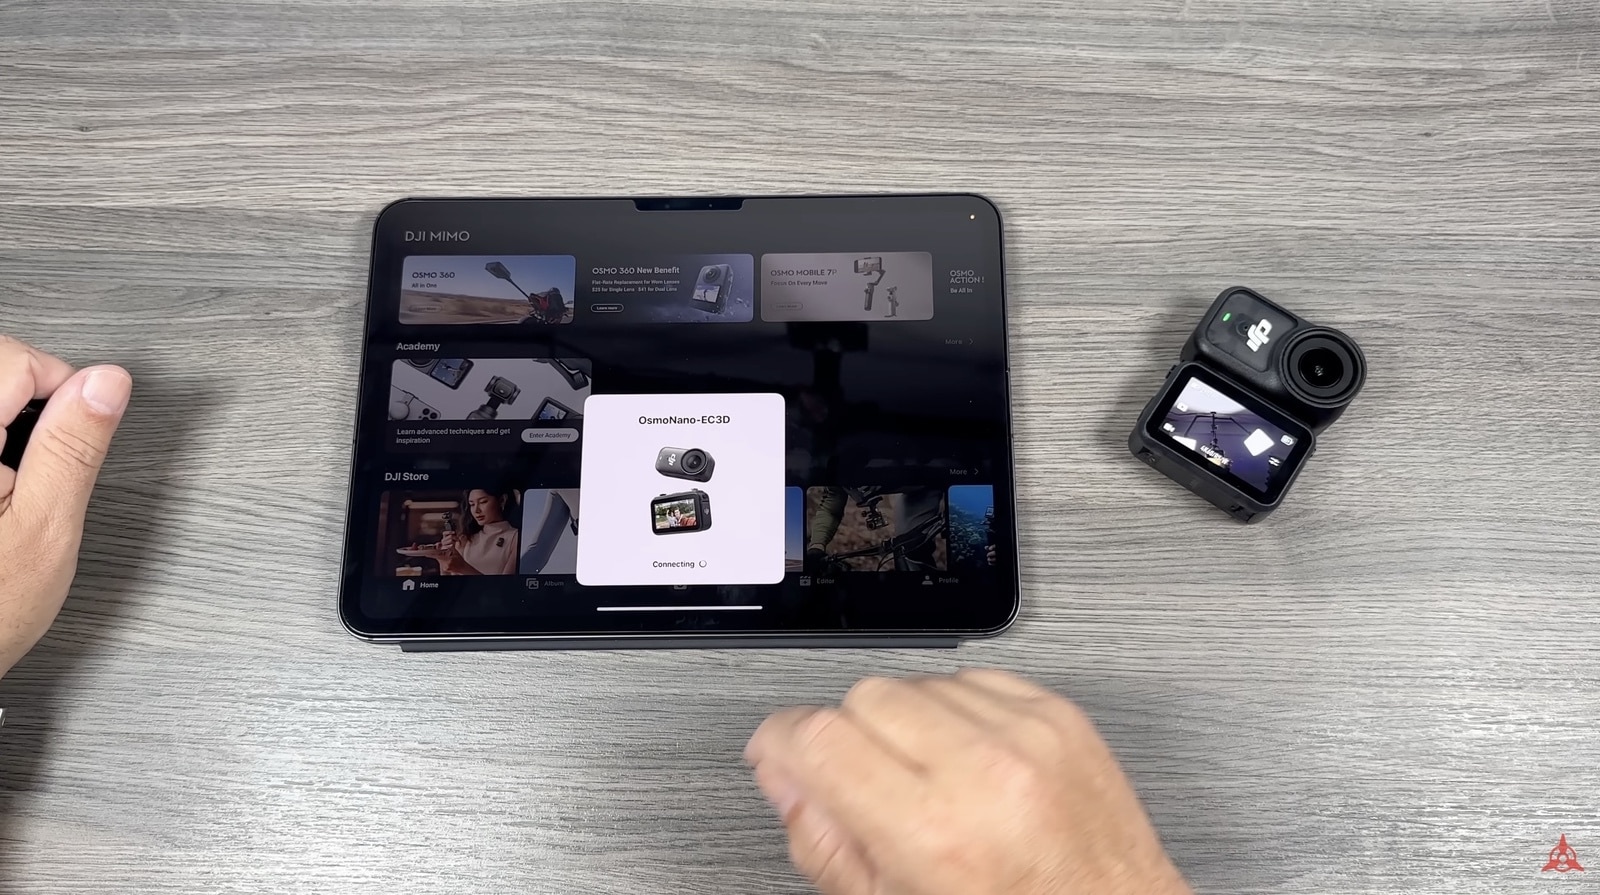
There are a couple of different ways in which we can do that. The easiest is by downloading the DJI Mimo app to a smartphone or tablet. Mine has already been activated and updated. I’ll just explain what has to be done here, and I’ll show you some footage of when I did mine.
Essentially, you’re going to launch the DJI Mimo app. It can be downloaded from the Apple App Store. If you’re on Android, I do believe it has to be downloaded directly from the DJI website. Right away, it should detect the camera and prompt you to connect to its Wi-Fi. You will need to sign in with your DJI account. If you don’t have a DJI account, it does give you the option to create one.
Once you’re logged in with your DJI account, it’s going to ask you to activate. Activation just takes a few seconds. It’ll give you a confirmation once the camera has been fully activated. Then right away, it’ll prompt you to update the firmware. The firmware update doesn’t take very long—it can take upwards of 5 minutes. The camera may restart, so it’s important not to power the camera off. Wait until you get a confirmation that the camera has been updated successfully, and you will get a notification on the screen that everything is ready to go.
Other than that, once you have the camera activated and the firmware updated, you do not need to use the app in order to utilize the camera. However, the DJI Mimo app for the camera is a really beneficial tool. Essentially, you can use the app as a remote. You can use it to stop and start recording. It’ll give you a visual preview to help you line up shots. You can change all your settings, and it’s a nice simple way to manage your media. You can download content to your mobile devices and do some basic editing. So it is a really nice companion tool for your Osmo Nano.
Later in this video, when we’re talking about downloading content to your mobile device, I’ll show you how you can utilize the DJI Mimo app to transfer your content.
Powering the Camera On and Off
At this point, we’re going to take a look around the menu system, and I’m going to show you how to navigate it and how to change settings. First, I’m just going to show you quickly how to power the camera on and off. There are actually a couple of different ways we can do it.
If you notice here, we have a shutter and power button on the side of the vision dock, and we have another one at the top of the camera module. For the most part, the functionality of these buttons is the same. However, the behavior is a little bit different.
Using the Side Button
If we want to power the camera on using the side button, all we have to do is a simple press, and the camera is going to power on. To power it off, we’re going to do a press and hold, and the camera will power off.
Using the Top Button
This top button is similar, but it is a little bit different. For example, if we do a simple press on it, the camera’s going to power on, but it’s going to automatically start recording. I’ll just demonstrate that for you. You can see it powered on, and it automatically started recording. A quick press on it will stop recording, and then the camera will power off.
If you want to use this top button to power the camera on but you don’t want it to automatically start recording, we actually have to do a press and hold on it. As you can see, it will power on but it won’t start recording. Then it functions the same as the side button. To power it off, we have to do a press and hold.
If you have the vision dock detached and you’re just going to be using the camera module, that button functions the same way. For example, if I do a quick press on it, the camera’s going to power on and automatically start recording. We know it’s recording because we get this red flashing light. A quick press on it again, and it stops recording and powers off.
If you want to power just the camera module on without it automatically recording, again, we have to do a press and hold. As you can see, it powered on, and we know it’s not recording because we just have a solid green light. In this state, we can just tap the shutter button and it will start recording. But if you want to power it off again, we have to do a press and hold.
Essentially, the top button and side button perform the same tasks—just the behavior is a little bit different. In the settings, we can actually adjust the behavior of those buttons, and we’ll take a look at that as we go along in the video.
Remote Power-On
One last quick thing I want to show you here is we can actually power on the camera module directly from the vision dock when it’s disconnected. Just like before, all we have to do is a single press on the vision dock. That’s going to power it on and power on the camera module. Essentially, this now just becomes a remote with a live preview. We can use the shutter button on the side to start and stop recording, and we can change all our settings. And again, we can do a press and hold to power both units off.
Menu System Navigation
Let’s take a quick look around the menu system so you know what everything is. At the top right-hand side, you can see we have two battery icons. The top one is for the camera module and the bottom one is for the vision dock. We can actually tap on that, and that’s going to give us a larger graphic that’s a little bit easier to read.
At the top left-hand side, that’s going to tell us how much storage we have on the camera. Again, depending on your settings and what mode you’re in, that’ll change depending on what you have it set to.
Over on the very right-hand side, we have a play button. That’s how we get into previewing media that we’ve captured, and we will take a closer look at that coming up.
Bottom left-hand corner, we have a picture of a video camera—an icon of a video camera. That’s signifying that we are in video mode. Below that, it says 4K 30 RS. That means we’re filming at 4K 30 frames per second and we have RockSteady stabilization turned on.
On the very right-hand side in the middle, that’s just an icon signifying that we can tap there to get into some more advanced settings.
Adjusting Settings
Let’s take a look at how we can adjust some of these settings. The first thing we can do is swipe down from the top. That’s going to bring up our menu system. Right away, we get some graphics for some common things that people need to change quickly.
I’m not going to go through everything in the menu system because there’s a lot there. It’s a good idea, however, to go through them just so you can familiarize yourself with what’s all there. There are a few things we will be taking a look at throughout this video, most notably the mic icon because we’ll show you how you can connect an external microphone to it and things such as voice command.
From this menu, we can actually tap that icon. That’s going to go deeper into the menu system. Again, I would go through it and take a look at all what’s there.
Memory Information
From that main screen, we can actually swipe over, and that’s going to give us some memory information. It’s going to list the Nano internal memory and it’s going to list our SD card. It shows us the total amount of storage on both and how much of the memory is used.
A couple of things we can do from this screen: we can actually format the memory cards. If we tap the storage button, you can see it gives us an option to format the internal storage and format the SD card. That’s going to wipe everything off, so before you do that, it’s a good idea to make sure you have everything transferred. But that’s a quick, easy way to clear the memory card once it’s full.
The other thing we can do is export footage to the SD card. So if we have stuff stored on the internal memory, we can use this tool to transfer it from the internal memory to the SD card. That doesn’t always need to be done because we can connect this to the DJI Mimo app to transfer content, and it will be able to read it from both the internal memory and the SD card. The only reason you would really need to do that is if you plan on pulling the SD card out and plugging it into a computer.
I’m going to cancel that and we’ll go back to the main screen. That’s how you access all your settings—things that you need to adjust.
Additional Settings
The other settings we can adjust are over on the right-hand side here. If we tap that icon, it gives us a few options and different settings. Again, we’re not going to really get into it, but what you can do here is turn on pro mode. For those who like to set some of their own settings such as shutter speed and white balance, this is how you can do all that.
You can also set your color profile if you want to film in a flat color profile. We have endurance mode—that’s going to basically lower the power of the camera and extend the battery life. And a few other options such as glamour effect if you want to smooth out your skin if you’re doing some vlogging or brighten up your face a little. Again, something you should go through and familiarize yourself with what’s all there.
Frame Rate and Resolution
To change our frame rate and our resolution, we can access that information by swiping up from the bottom. You can see it brings up this tool here. For the most part, most people are going to be filming in 4K 16×9, but you can adjust that accordingly. You can go all the way up to 60 frames per second while filming in 4K. You can go down to 24 frames per second, and you can adjust the resolution to whatever suits your needs. You can do 1080 if you just want a small video file size, 2.7K, and of course we can film in 4K. That’s all going to boil down to personal preference and what your needs are.
Recording Modes
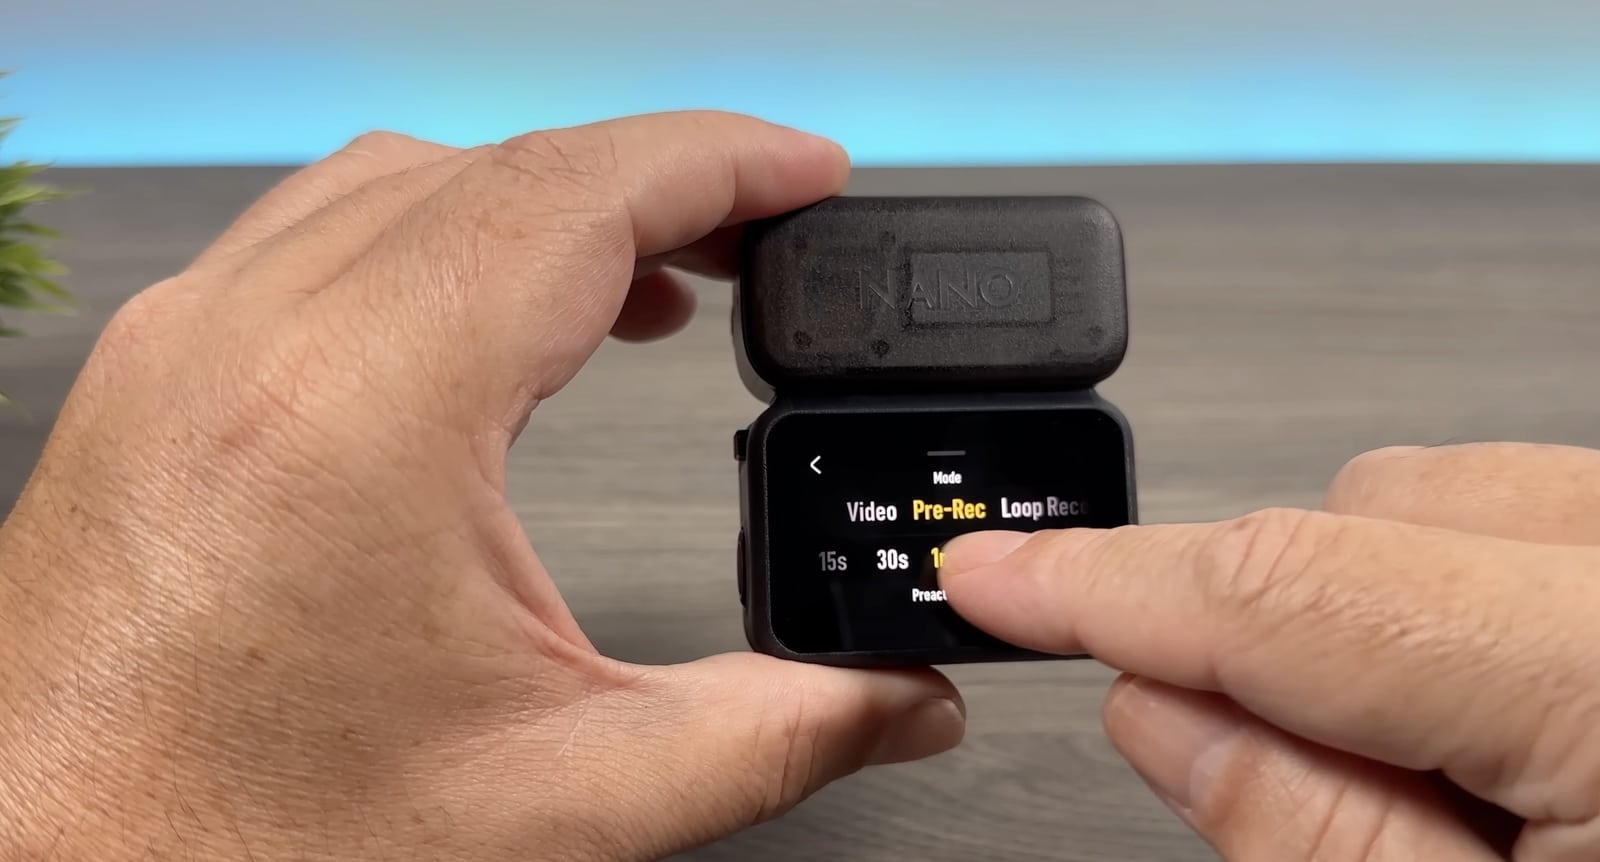
A couple of other things we can do from this screen: we can tap on that icon, and that gives us a few other options. The standard is video—that means we’re just going to be recording standard video. But we can do pre-recording. Essentially, that allows the camera to constantly be recording even before you hit the record button. The reason why that might be important is if something interesting happens and you go and hit the record button, you might miss the action because it happened before you actually hit the record button.
So what that does is keeps the camera recording to a certain point. It tells us how long it will keep in its memory—15 seconds. You can set it to 30 seconds or 5 minutes. So that feature can be really important in some scenarios to capture some action shots. However, it’s important to note when you turn that on, essentially the camera is recording at all times. It’s not going to save everything, but it is going to be recording in the background. So that is going to eat your battery life up very quickly. It’s only something you should turn on if you know it’s something you’re going to need.
The other thing is loop recording. Essentially, it’s just going to keep recording over the same footage. Again, that can be handy in some scenarios if you know something is going to happen but you’re not sure when. That’ll allow it to keep recording without filling up the memory card. But for the most part, most people are going to be using the video mode.
Stabilization and Field of View
The other thing we can do from this screen is set our stabilization and our field of view. We do so by tapping that button on the top. On the left-hand side is our stabilization. For the most part, RockSteady is what you’re going to be using. That’s going to give you really good stabilization in most scenarios. You can turn it off if you wish, but then your footage is going to be quite shaky. There are some situations where you do want to turn it off, but for the most part, you’re going to be filming in RockSteady.
The other alternative is horizon balancing. What horizon balancing does is—if you look at the back of my desk there—you can see as I turn the camera, the horizon is going to stay perfectly level. So that can be handy if you’ve got this mounted, say, on a chest mount and you’re walking or doing something and you don’t know if the horizon is going to be perfectly level or not. That will keep it level until you get to 30 degrees. You’ll notice when I do turn it, then it will finally go to the side.
But for average walking and different things, it is handy to use in some scenarios. The only thing you have to keep in mind is that when you have that feature on, it is going to be heavily cropped in, so you’re not going to get quite as wide of a field of view. You just have to decide whether you want to use RockSteady or that horizon balancing. I personally just use RockSteady at all times. I find it gives a nice balance of steadiness and movement, because sometimes you do want a little bit of movement in your footage. It makes it look a little more real and a little bit more dynamic.
Field of View Options
The other thing we can do here is set our field of view. We have the option for dewarp. Essentially, that’s going to get rid of most distortion so it doesn’t look quite as distorted.
The next option is wide. We can set it to a wide field of view, which is going to allow us to capture more of the scene in front of us—it’s essentially giving us a wider field of view. The only thing with a wide field of view: once we increase the field of view to a wider field of view, it’s going to introduce some distortion. As you can see at the back of my desk, see how it starts to get a little bit curved. So for some scenarios, you might want dewarp on where you won’t have that as much. But there are going to be other scenarios where you want a wider field of view so you can fit more in the screen.
And then, of course, we can go up to ultra-wide, which is going to give us an even more immersive wide field of view, but the distortion is going to be even heavier. You just have to decide on what you’re filming and what type of field of view you want. Myself, I usually tend to film in a wide field of view. I find that’s a really good middle ground. There are some times where I turn on dewarp if I don’t want that distortion at all.
To get out of there once you have it set the way you want, we can swipe down from the top and that’ll get rid of that menu system.
Changing Filming Modes
Of course, the other thing we can do is change the filming mode. We can do so by touching that camera icon in the bottom left-hand side. It’s going to bring up this menu, and as you can see, we can cycle through some of the different filming modes: photo, video, slow motion, and time-lapse. That’s at the time of filming this video. This is still technically pre-release, so they could be adding other modes to it by the time the final version is out.
The other way we can change the filming mode is just by tapping on the center of the screen and swiping. You can see it brings up that same menu.
Another way we can change the filming mode is by doing a double press on the shutter button on the side. A single press will start recording, but if we do a quick double press, then a single press, you can see it’ll switch back and forth. As mentioned, if I just did one single press, it would start recording.
We can actually change the button behavior in the settings. If we swipe down from the top and tap on that icon, you can see it gives us an option to change the behavior of the buttons. For example, if we go to the vision dock, you can see double press is set to switch between modes, but it gives us other things we can set it to. Same with the camera module—we can set a single press and a double press behavior. So you can adjust that according to your own needs.
Previewing Media
The last thing we can do from this screen is preview media that we’ve captured by tapping on the play button on the right-hand side. By default, it’s going to bring up the last video or photo that we’ve captured. We can tap on it to play it. We can set the volume or mute it altogether by tapping that icon at the top right-hand side.
There are three dots on the very left-hand side—they might be kind of hard to see, they’re grayed out. That allows us to add it to favorites or delete it. We can tap this grid icon at the top left-hand side, and that’s going to bring up everything currently stored on the memory.
As mentioned, there are two memory locations: we have the internal memory of the camera module and we have a memory card. You’ll know what you’re reading by the little icon at the top. You can see it has a little icon of the camera module and it says seven, so that means there are seven videos stored on the memory and that’s what we’re reading the memory from.
If we want to read memory from the memory card, we tap on it at the top, and it allows us to switch between the internal memory and the SD card, and whatever content is stored on that location will be displayed.
Capturing Content
When it comes to capturing content, there are a couple of different ways we can do it with our Osmo Nano. The first most common way is just a single press on the shutter button. Right now, I’m in video mode and I can just do a single press and it’s going to start recording. Another press will stop recording.
This button also acts as a shutter button, so I can do a single press on it as well, and again, it’ll start recording.
As mentioned, if you detach the camera module, you can still use this as a remote. For example, I can press the record button, and as you can see, it’s starting to record, and I can stop recording. I can still go in, change all the settings, and make any adjustments I want to the camera.
When it’s detached, you can also just use the shutter button on the camera. Say you have both powered completely off and you’re just using the camera module—a single press on the record button is going to power it on and start recording automatically. I’ll press the record button here. You can see it powers on and it’s going to start recording. We know it’s recording because we get this red flashing light. Then to stop recording, we’ll press the record button again. It’ll stop recording and power off.
Voice Command
The other way we can capture is with our voice and voice command. We do have to enable that setting, and we do so by swiping down from the top to bring up our menu system. We’re going to tap that icon of the talking head, and we’re going to enable voice control. It’s going to ask us what language we want. I’m going to set mine to English.
If we scroll down further, it gives us all the different voice commands we can say. So now that it’s enabled, we have a little extra icon on the screen just so we know that voice command is enabled. We can simply say “start recording.” You can see it goes ahead and starts recording. Now I can say “stop recording,” and it’s going to stop recording.
The other thing we can do is tell it to “take photo.” You can see it went ahead and took a photo. What was interesting is we were in video mode, but it automatically switched us into photo mode and took the photo. So you don’t actually have to be in that specific mode to give it a command. For example, it left us in photo mode, but I can say “start recording,” and again, it went ahead and switched us into video mode and started the recording. So you don’t actually have to be in the specific mode.
One thing to be aware of with voice command is sometimes it can pick up commands even though you don’t say anything. There might be other people talking in the room or a TV playing. It can sometimes pick up a voice command. So myself, I usually leave mine off unless I know I’m going to be using it.
Gesture Control
I’m just going to show you another quick way in which you can capture, which is something new with the Osmo Nano, and that is by using a few different gestures. We can use a tap gesture or we can use a nod gesture. That can be really beneficial, especially if you have the camera module mounted on a headband or your hat. Instead of fumbling around trying to find the record button, you can just simply nod your head twice and it will automatically start recording. Or you can just double-tap on it and that will start recording as well. That can be useful if you have this mounted on your chest.
I’ll just show you how to set that up here. We’re going to swipe down from the top. This icon down here in the bottom left-hand side that says “auto”—that’s how we get into the automatic capturing features. You can see it says “tap,” and we can tap right below that and it says “nod.” So we can choose between those two methods. Then below that there is one called “custom” where you can set a few other parameters, but let’s set up the tap one where you pat or tap it.
We’re going to click next. There are some different parameters we can enter for recording length and the resolution. I’m just going to leave it all on default. I’ll hit next. I’ll hit next again. So now it’s going to power off the camera. These gestures will work when the camera is connected or if it’s disconnected, and most of the time you’re going to be using them when you’re just using the camera module because it makes it easy and quick to start capturing.
For example, the camera is powered off, so you can just imagine that you have this on a hat clip or on a headband. All you have to do now is double-tap on it. As you can see, it powered on and it started recording. It’s going to record for the duration that we have set, or you can manually shut it off when you need.
Again, the nod works the same way. You can set it to nod and then just nod your head twice and it will automatically power on and start recording.
Adding an External Microphone
The other really nice thing about DJI cameras is that they support something called Osmo Audio. You can purchase these additional microphones and they can connect wirelessly right to the camera without the need of any other type of receiver or physical connection.
I’m going to be demonstrating with the new DJI Mic 3, but it is compatible with the DJI Mic Mini or the DJI Mic 2. Adding a microphone to it isn’t something that is completely necessary. It’s a good idea if you’re going to be using your camera for vlogging or you want really good audio—you want to capture really nice ambient background sounds—then adding an external microphone such as the Mic 3 is a good idea.
Pairing the Microphone
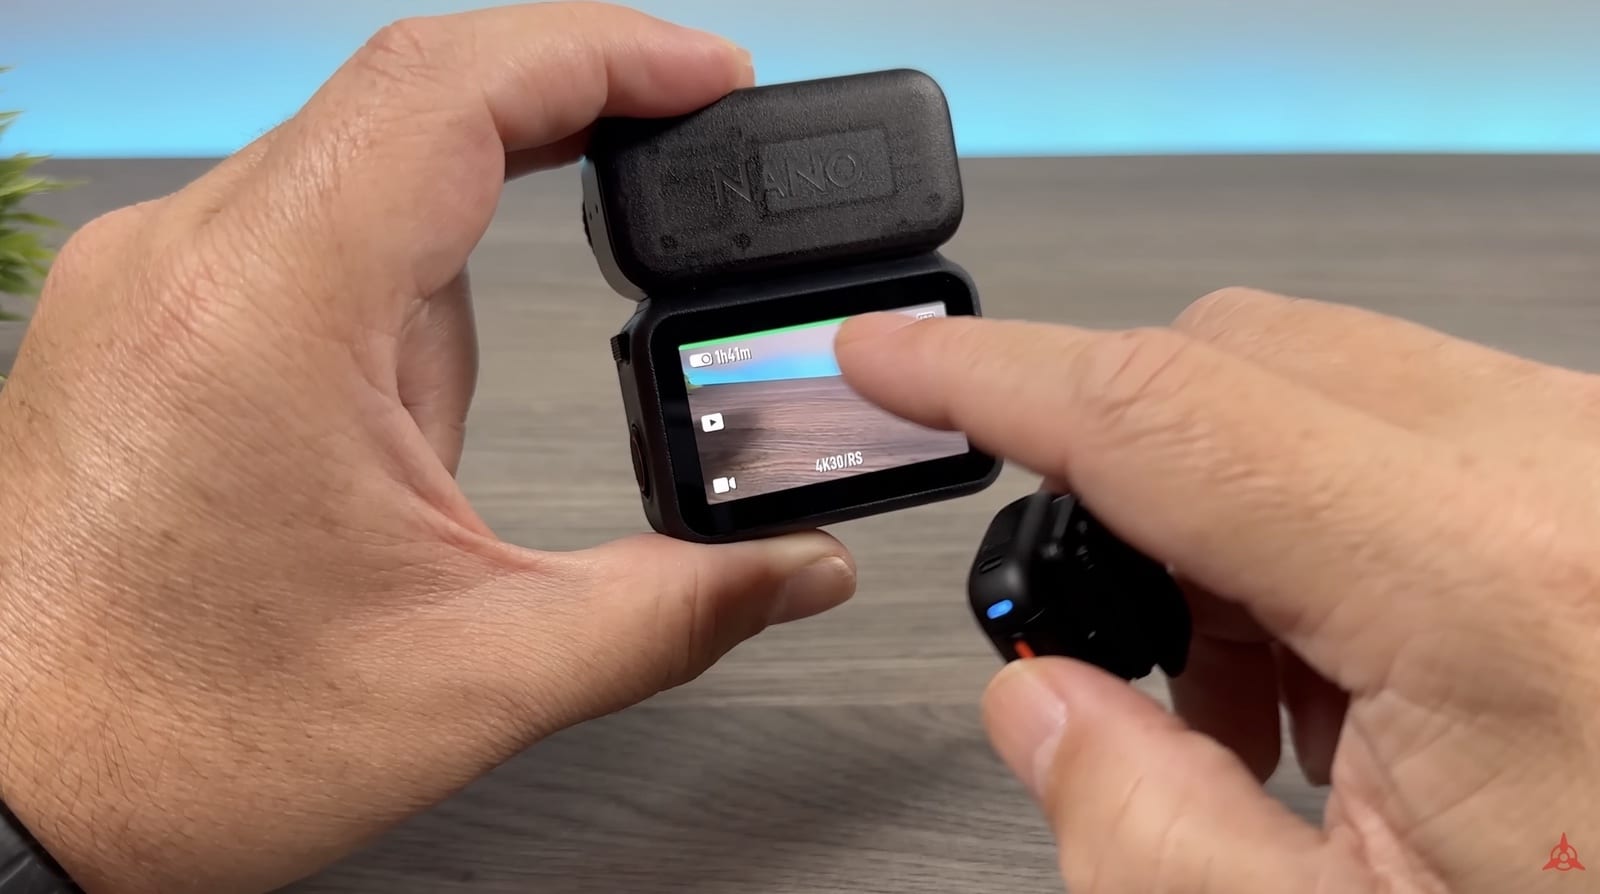
To pair the microphone, it’s really simple. We’re just going to swipe down from the top. We’re going to click on that microphone icon. We can actually connect two of these microphones, but for this video, I’m just going to connect one. So I’m going to tap on number one. The camera is now in pairing mode, and we just have to put the microphone into pairing mode. We do so by pressing and holding the linking button—that little linking button there. That light will flash green and blue. That means it’s now linking.
You can see we got a confirmation that it’s been connected via Osmo Audio. When it’s connected, you can see that we get this extra bar at the top—that’s basically an audio meter, that green bar at the top. That’s just a really nice, simple way to get nice, clean, high-quality audio in your recordings.
Transferring Content to Mobile Devices
At this point, I’m going to show you how to transfer the content from the camera over to your mobile device. I’m demonstrating on an iPad, but this works exactly the same way whether you’re using a tablet or a smartphone.
There are actually three different methods in which we can transfer content, and I’m going to show you all three methods.
Method 1: Memory Card Reader
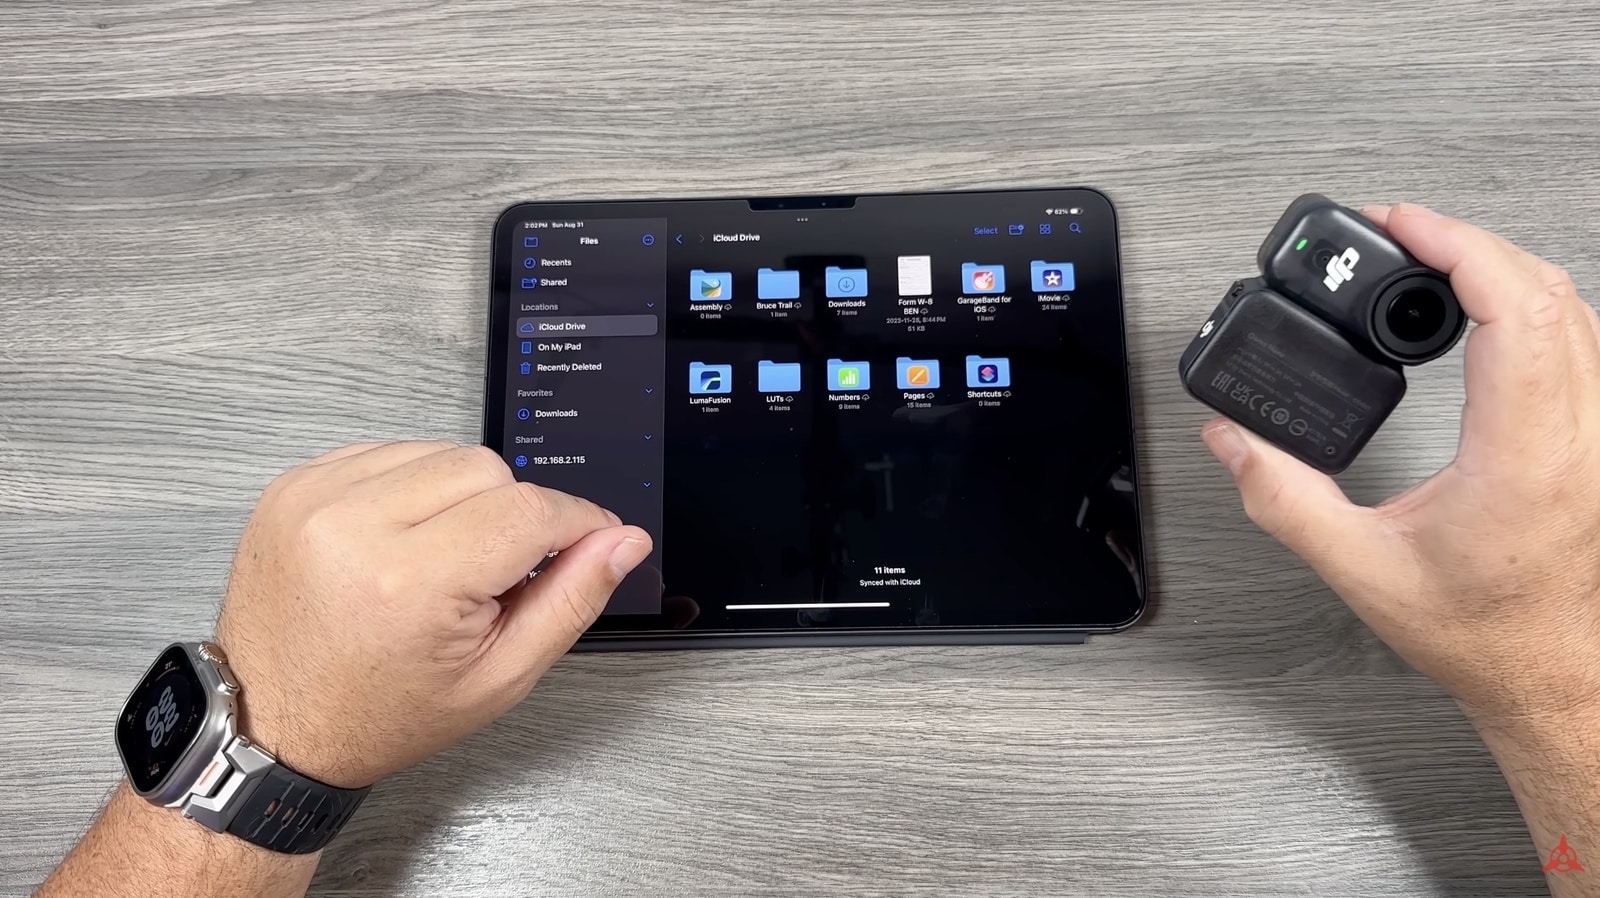
The first method is simply by pulling the memory card out and using a memory card reader and plugging it directly into our device. I’ve just pulled the memory card out. It is really important to remember that there are two storage locations on the camera: there’s the memory card and then there’s the internal storage of the camera. So if you’re going to do this method and you’re going to take the memory card out, it’s only going to read the files that are currently stored on the memory card.
If you want to transfer everything over, you have to go into the memory tool that I showed you earlier, and you have to transfer everything first from the internal memory to the memory card. Then you’ll be able to transfer everything over.
I’m going to put the memory card into a card reader. Then I’m going to plug it into the USB-C port. Because I’m using an iPad, I’m going to launch the Files app. You can see on my iPad here under locations, we now have something listed as Osmo Nano. I can tap on that. We’ll go into that folder, that folder, and now there’s everything that was stored on the memory card.
From there, we can bring the files up, we can preview them, and of course, we can select them and then move them over to the tablet. So that’s a pretty quick and simple way—just plugging the memory card with a memory card reader directly into the device. Again, you just have to remember to move the content from the internal memory over to the memory card first before you pull it out.
Method 2: Direct USB Connection
The second method is very similar, but instead of using a memory card reader, we’re actually going to plug the camera directly into our device. What we want to do here is make sure our camera is turned on. We’re going to take the cable that came with the camera. We’re going to plug it into our device, and then we’re going to plug it into the side of the camera into the USB-C port.
Once we plug it in, we’re going to get an option on the screen. It’s going to give us three different options: one is to just charge it if we just want to plug it in because we want to transfer some power to it. Then it gives us what storage location we want it to read—it’ll ask us to read from the memory card or from the internal storage.
I’ll plug it in. You can see it says “file internal storage” or it also said “file from SD card.” You just have to do one at a time. You can only read from one location at a time.
Now again on an iPad, if I go to my Files app, it’s listing the Osmo Nano. Go into those folders, and now there’s all the content that’s currently stored on the internal memory.
If you want to read from the memory card, all you have to do is unplug it, plug it back in, and this time we’re going to select SD card. It should pop up here in a minute. There it is. And now there’s the content that’s currently on the memory card.
Those two methods work really well and they work both for mobile devices and for a more traditional computer. You can plug this camera directly into your Mac or your PC and you’ll be able to read the files in a very similar fashion.
Method 3: DJI Mimo App Wireless Connection
The third method is by using the DJI Mimo app and connecting wirelessly to the camera. This can be very beneficial for a couple of reasons. First of all, we don’t have to choose between the internal storage or the memory card. When we browse the content on the Mimo app, everything is going to be listed in one area.
The other benefit is that we can actually share the content right from the memory card. We don’t even have to download it. We can also do some basic editing. So if you have limited storage on your device, that might be a good method. That way, you can just transfer over the little bits and pieces that you need.
In order to connect, we’re going to make sure the camera is powered on. It’s also a good idea to make sure the camera module is connected to the vision dock. Then we’re going to launch the DJI Mimo app.
Right away, it should start searching for the camera. There it is. It’ll ask us to join the Wi-Fi. Once it connected, it went ahead and displayed all the files.
As mentioned, right now it’s displaying all the files stored on both the internal memory and the memory card. These files up here are from the internal memory and these files here are actually coming off the memory card.
We can do a couple of different things here. We can actually go into each individual file. We can preview it. If we want to download that individual file, we can tap that button at the top. It’s going to go ahead and download it.
But as mentioned, you can see we have all our editing tools right at the bottom. So if we want to crop it to a different aspect, do some color grading, trim it down a little bit, there are all different things we can do to it directly while it’s on the memory card. We don’t even have to transfer it over. We can also share it directly just by tapping that button, and you can see it gives us an option to share to different platforms.
For some people, that might be a great solution because you don’t have to transfer the content over. If you have very limited storage, that can be very beneficial.
If we go back to the main gallery view, if you just want to transfer everything over at once, we can do batch selection, and we can do that in a couple of different ways. We can tap that icon at the top, and then we can just select the files that we want, and then you just tap the download button at the bottom.
The other way to select is just by doing a batch selection of the whole date range, as you can see. Again, then you just hit the download button. You can see at the top here, we can filter it by photos, videos, or favorites. So if you favored any photos while you were filming, it’ll be easy to find what you’re looking for.
It’s also important to note when using the DJI Mimo app, when you’re downloading your content, it’s going to be stored right in the camera roll of the device. Unlike the other methods where we are using the Files app and the footage will be stored in your files, when using the DJI Mimo app, everything is going to be stored right in the Photos app.
Connecting Without the Vision Dock
I just want to show you here quickly: if for some reason you’re out filming with just the camera module, you can still connect it wirelessly to the DJI Mimo app without the need of the vision dock. It works essentially the same way. But when we power it on, we want to do a press and hold of the shutter button. As we talked about earlier, when the camera module is disconnected and we just do a quick press on the shutter button, that’s going to power the camera on but it’s going to start recording right away. But if we do a press and hold on it, it’s actually going to power it on. We know it’s not recording because this light is still green.
If you want to transfer content, that’s the way you power it on without starting to record. Just like before, we’ll tap that camera icon. It’s going to find the camera module. We can connect. There we go. It’s now displaying the content. But you’ll notice this time it’s not displaying those extra videos that were stored on the memory card because now we’re just connected directly to the camera module.
Folks, that is my beginner’s guide for the DJI Osmo Nano. If this is a camera you’re interested in, make sure you’re subscribed as I will be covering it fully over the coming weeks and months. We’re going to make more advanced tutorials and demonstrations. So if you want to learn more about it, make sure you’re subscribed. Hopefully, you enjoyed this video and found it had value. Thanks a lot for watching, and we’ll see you in the next one.
Discover more from DroneXL.co
Subscribe to get the latest posts sent to your email.
Check out our Classic Line of T-Shirts, Polos, Hoodies and more in our new store today!

MAKE YOUR VOICE HEARD
Proposed legislation threatens your ability to use drones for fun, work, and safety. The Drone Advocacy Alliance is fighting to ensure your voice is heard in these critical policy discussions.Join us and tell your elected officials to protect your right to fly.
Get your Part 107 Certificate
Pass the Part 107 test and take to the skies with the Pilot Institute. We have helped thousands of people become airplane and commercial drone pilots. Our courses are designed by industry experts to help you pass FAA tests and achieve your dreams.

Copyright © DroneXL.co 2025. All rights reserved. The content, images, and intellectual property on this website are protected by copyright law. Reproduction or distribution of any material without prior written permission from DroneXL.co is strictly prohibited. For permissions and inquiries, please contact us first. DroneXL.co is a proud partner of the Drone Advocacy Alliance. Be sure to check out DroneXL's sister site, EVXL.co, for all the latest news on electric vehicles.
FTC: DroneXL.co is an Amazon Associate and uses affiliate links that can generate income from qualifying purchases. We do not sell, share, rent out, or spam your email.


