DJI Osmo Action 6 Beginners Guide: Everything You Need To Know
Check out the Best Deals on Amazon for DJI Drones today!
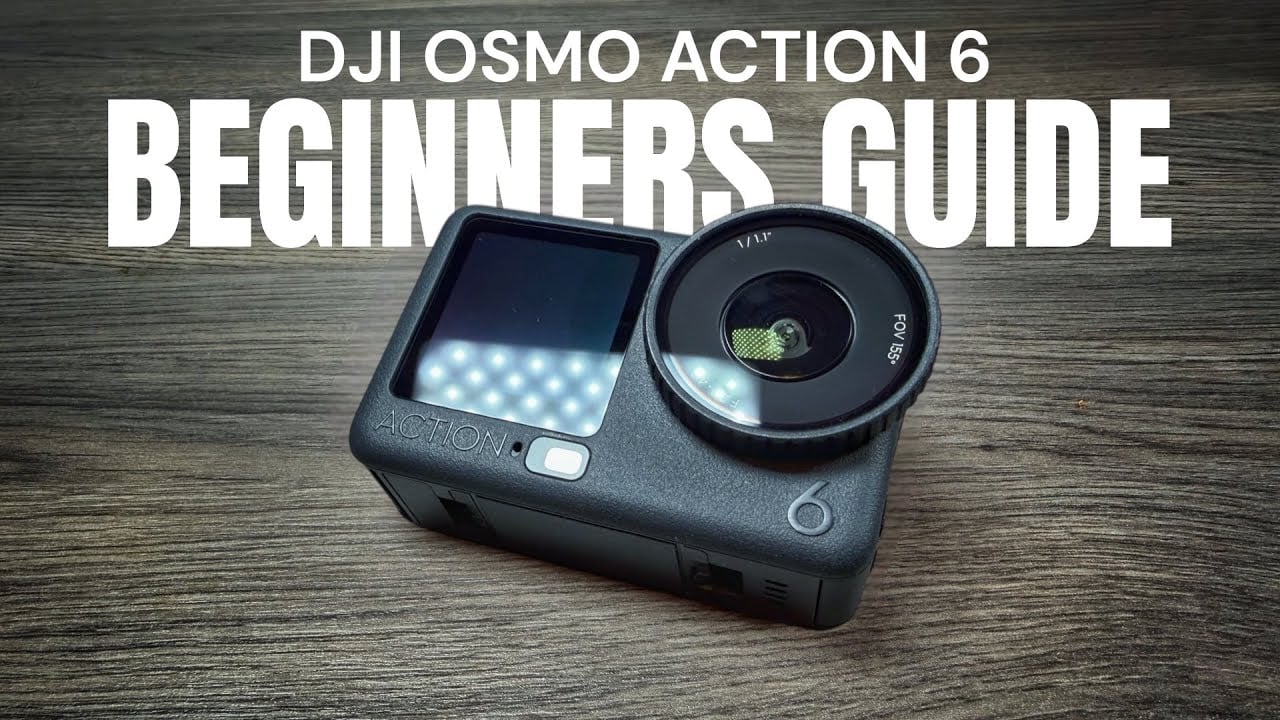
Good day, folks. Shawn here from Air Photography. This is my beginner’s guide for the brand new DJI Osmo Action 6. When new hardware like this gets released, I like to create guides to help those who are brand new get familiarized with both the hardware and basic functionality.
We’re going to keep this beginner’s guide basic, covering everything you need to get out and capture content with your new camera.
If you’re brand new to DJI action cameras, consider subscribing to my channel. I’ll be making other tutorials and demonstrations that dive deeper into the camera’s capabilities.
Which Package Should You Buy?
DJI offers several different packages for the Osmo Action 6. They have basic camera packages that include just the camera, and they have combo kits like the Adventure Combo.
I highly recommend the Adventure Combo if you haven’t purchased one yet. You get everything you need as a new user to start filming right away.
With the Adventure Kit, you’ll receive:
- Extension pole for selfie shots and action footage
- USB-C to USB-C data and charging cable
- Curved adhesive sticky mount
- Mounting spacers
- Quick start guide and stickers
- The camera itself
- Two magnetic mounts
- Two thumb screws
- Charging hub
- Three batteries total
If you get the base package, you’ll only receive the camera, one battery, and no charging hub or extension pole.
Hardware Overview
Let me walk you through the camera’s layout.
At the front, there’s a removable lens protector. If it gets cracked or scratched, you can order replacements online. DJI also sells different lenses that enhance the camera’s capabilities.
That small sensor at the front is a color temperature sensor that ensures accurate colors in various scenarios.
The front screen is a touchscreen. You can input settings directly from it, which is great for vlogging when the camera faces you.
At the top is the shutter button for taking photos or starting and stopping recordings.
On the side, you’ll find the power button and quick switch button.
Understanding The Two Doors
The camera has two doors, and understanding them is critical.
The first door covers the USB-C port. Press the tab, slide down, and it opens. This door is designed to be removable since some accessories require it. If it comes off, don’t panic. It just clips back on.
The second door houses the battery and memory card slot.
Here’s something very important: When you see red lines on these doors, that means the camera is not sealed. This camera is waterproof without any housing, so make sure everything clicks and all the red disappears before going near water.
Installing Memory And Battery
The DJI Osmo Action 6 has 50 GB of internal memory, so you can use it without a memory card. Or install a card to expand your storage.
To install the battery, open the large door. Orient the battery with the leads facing the door, slide it in, and push down until it locks.
For the memory card, I always use SanDisk Extreme Pros. A 256 GB card is a good size for modern cameras. I wouldn’t go smaller than 128 GB since you’ll fill up quickly.
Insert the card with the graphic side facing the battery. Push it down until it clicks. To remove it, press down and it will pop out.
Magnetic Mounting System
One of the best features of the Osmo Action 6 is its magnetic mounting system.
The magnetic mounts that come with the camera attach to the bottom. Some accessories already have magnetic mounts built in, like the mini extension pole that doubles as a tripod.
To attach, simply connect the camera until you hear a click. To release, press the two tabs on the sides and pull.
You don’t have to use DJI accessories. If you have GoPro mounts or generic third-party accessories with finger mounts, they’ll work. Just attach one of your magnetic mounts to the finger mount using the thumb screw.
The included spacers are for older or poorly made mounts where tolerances aren’t great. I’ve personally never needed them, but they’re there if you do.
Charging Options DJI Osmo Action 6 Camera
How you charge depends on which kit you purchased.
Most electronics don’t come with charging bricks these days, so you’ll need one. I use an Anker 65-watt charger that works great for multiple devices. Any USB-C to USB-C cable will work.
To charge the camera directly: Open the USB-C door, plug in the cable, and you’ll see a graphic showing charge progress. It supports quick charging, going from zero to 80% in about 20 minutes.
To charge with the hub: Plug into the USB-C port on the side. Green lights mean fully charged. Amber lights mean charging. You don’t need all three batteries installed to use it.
Bonus: The charging hub doubles as a power bank. You can plug it into your smartphone to transfer power from the batteries.
Activation And Firmware Update
Before using the camera, you need to activate it and update the firmware. DJI allows up to five uses before activation, but I recommend doing it immediately.
Download the DJI Mimo app from the Apple App Store. On Android, download it directly from DJI’s website.
You don’t need the Mimo app to use the camera after activation. But it’s a great companion app for using your smartphone as a remote, getting live preview, managing content, and basic editing.
To power on, quick press the power button. To power off, press and hold for two to three seconds.
When you first connect to the Mimo app, accept the connection on the camera, agree to terms, and tap activate. Then download and install the firmware update when prompted.
Navigating The Menu System
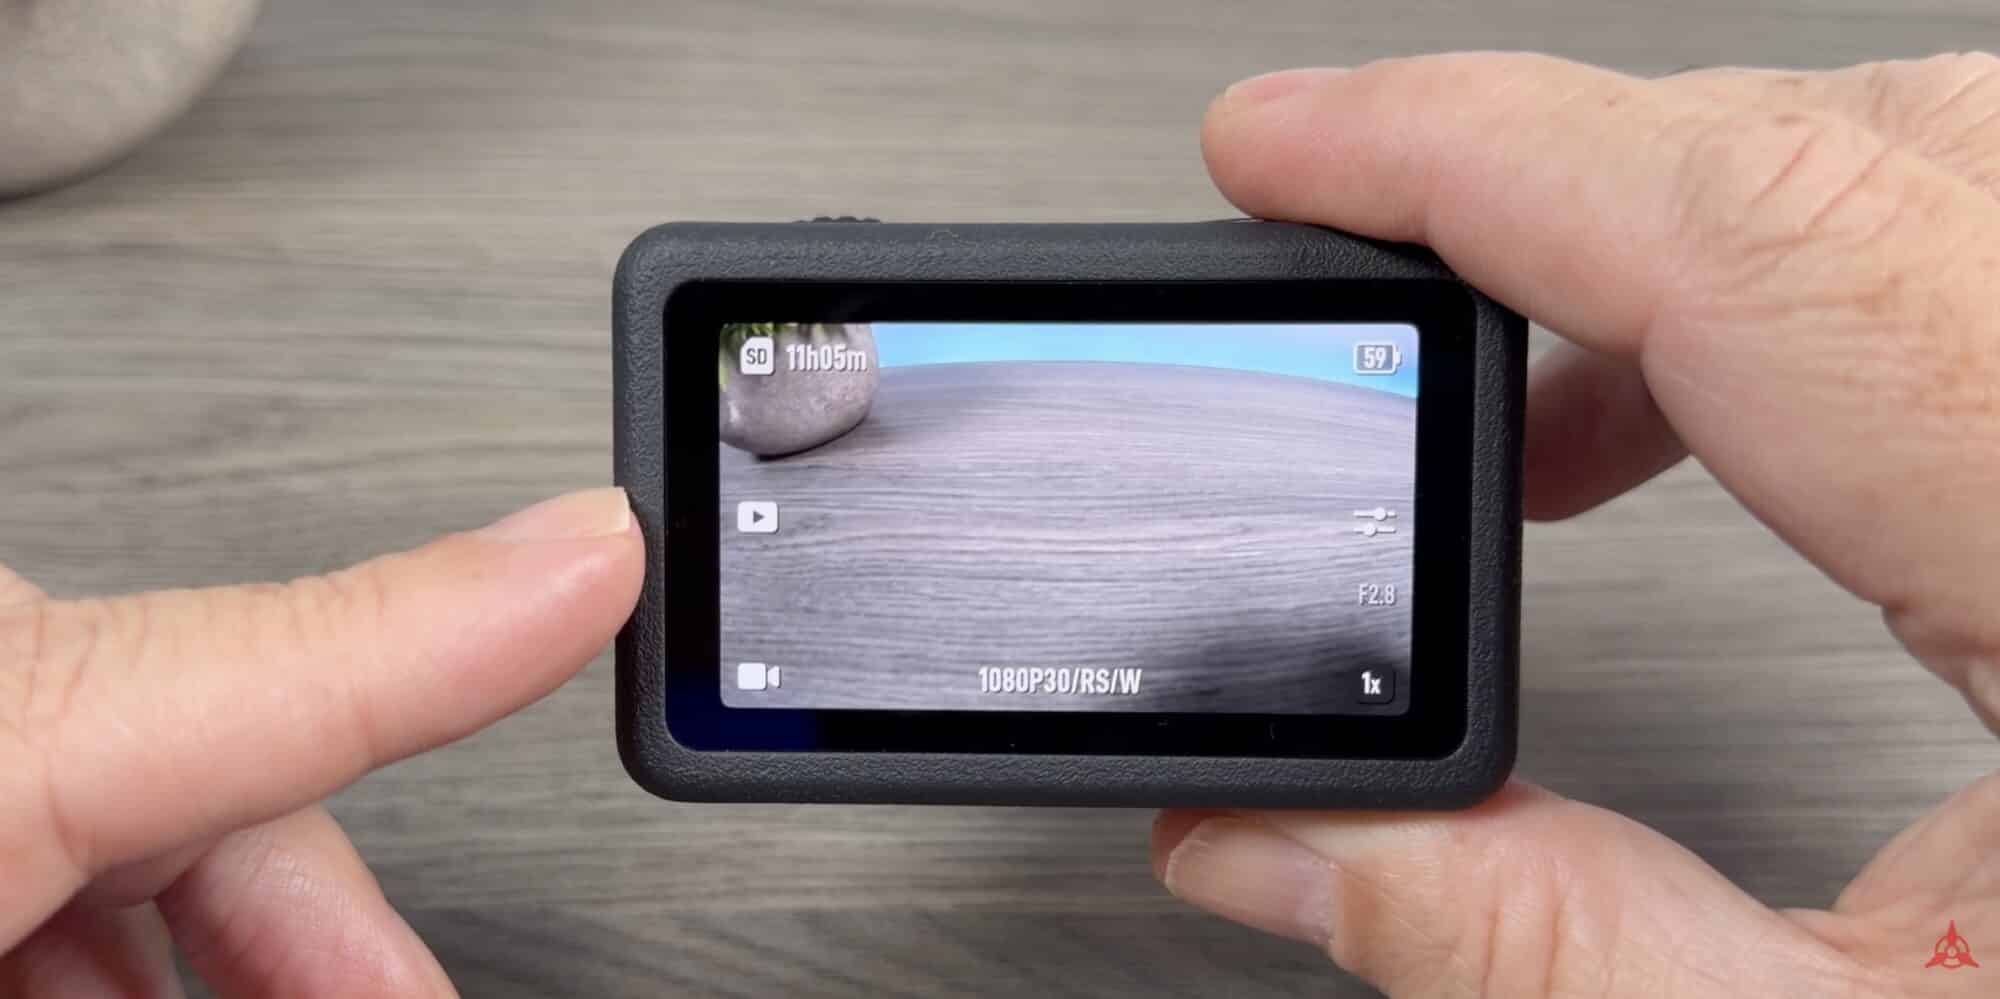
Here’s a quick rundown of what you’ll see on screen:
- Top right: Battery level
- Top left: Storage remaining (changes based on settings and mode)
- Play button: Access stored media
- Bottom left: Current mode (video/photo icon)
- Bottom center: Frame rate, resolution, stabilization, field of view
- Bottom right: Zoom level (1x or 2x)
- Above zoom: Aperture (shows f/2.8 or current setting)
To access main settings: Swipe down from the top. You’ll see common settings people change regularly.
Swipe over to find memory management. This is where you switch between internal storage and the memory card. You can format either one here, but make sure all your content is transferred first because formatting deletes everything.
For deeper settings, tap the gear icon. I recommend exploring everything so you know what’s available.
Resolution, Frame Rate, And Field Of View
Changing these settings is easy. Tap the information at the bottom or swipe up from the bottom.
I typically film at 4K 16:9 at either 30 or 60 frames per second. Adjust to whatever suits your needs.
For stabilization, RockSteady is good for everyday filming. I have a separate video explaining the differences between stabilization modes.
Field of view determines how much fits in the frame:
- Wide: More visible, but some distortion
- Standard Dewarp: Removes distortion but crops tighter
- Ultra Wide: Extremely wide view with heavy distortion, great for chest mounts while biking
- Natural Wide: New to the Action 6, gives wide field of view with reduced distortion
The camera supports 2x digital zoom. DJI claims it’s lossless, but I’d use it sparingly since it won’t look as good as using the full sensor.
The New Aspect Ratio Feature
One of the biggest new features on the Osmo Action 6 is adjustable aspect ratio thanks to the new square sensor.
Previously, filming vertical content for short-form platforms meant physically mounting your camera vertically. Now you can set it in software.
Swipe up and find the aspect setting in the middle:
- Default: Horizontal when mounted horizontally, vertical when mounted vertically
- Vertical: Always films vertical regardless of mounting
- Landscape: Always films horizontal regardless of mounting
- Custom: Films in a square aspect with crop lines
The custom square mode is a game-changer for some creators. You can film once and crop to multiple formats in post without losing resolution. The crop lines show during recording, but you can double-tap to hide them.
Four Ways To Capture Video
There are four different ways to initiate video capture on the Action 6.
1. Shutter Button: The simplest method. Press to start, press again to stop.
2. Voice Control: Enable it by swiping down and tapping the voice control icon. Say “start recording” to begin and “stop recording” to end. You can even say “take photo” while in video mode and it will automatically switch.
I leave voice control off unless I know I’m using it because your camera can pick up random commands from TVs or people around you.
3. Gesture Control: New to the Action 6. Enable it in settings, then hold up your palm to start and stop recording. Great when the camera is mounted away from you.
4. Snapshot Mode: If something happens quickly and your camera is off, just press the record button. It instantly powers on and starts recording. Press power again to shut down.
Pairing DJI Wireless Microphones
The Action 6 works with DJI wireless mics using Osmo Audio. It supports the Mic 3, Mic 2, and Mic Mini. The Mic Mini is the cheapest but still sounds great.
To pair:
- Power on the microphone (on Mic 3, press and hold the record button)
- Swipe down on the camera and go to main settings
- Select wireless mic (you can connect up to two)
- Tap transmitter one to enter pairing mode
- Press and hold the linking button on the microphone
- Wait for confirmation
Once connected, the light stays solid blue and you’ll see an audio meter on screen.
Transferring Content
There are three ways to transfer your footage.
Method 1: Memory Card Reader
Pull the memory card, plug it into a card reader, and connect to your device. Use the Files app to access footage. This method won’t transfer content from internal memory.
Method 2: Direct USB Connection
Plug the camera directly into your device using the USB-C cable. Power on the camera and select file transfer. This gives you access to both the memory card and internal memory.
Method 3: DJI Mimo App (Wireless)
Launch Mimo, connect to the camera, and you’ll see all stored content. You can preview, make quick edits, trim, color correct, and then transfer. Downloaded footage goes to your Photos app.
For batch transfers, tap the selection icon, choose multiple files, and hit download.
Using Mimo As A Remote
The Mimo app isn’t just for transferring content. You can use your smartphone as a remote with live preview.
Connect to the camera, tap the camera button instead of gallery, and you’ll see exactly what the camera sees. You can adjust all settings, change modes, and control recording.
This is incredibly useful when the camera is mounted away from you.
Final Thoughts
That’s my beginner’s guide for the new DJI Osmo Action 6. We covered the basics to help you get familiarized with the hardware and start capturing content.
If you’re brand new to the Osmo Action 6, I invite you to subscribe to my channel. I make lots of videos about these cameras covering different techniques and tutorials that might be helpful as you learn.
Hopefully you found this guide valuable. Thanks for reading, and I’ll see you in the next one.
Check out my Air Photography YouTube channel for more drone and camera tutorials.
Discover more from DroneXL.co
Subscribe to get the latest posts sent to your email.
Check out our Classic Line of T-Shirts, Polos, Hoodies and more in our new store today!

MAKE YOUR VOICE HEARD
Proposed legislation threatens your ability to use drones for fun, work, and safety. The Drone Advocacy Alliance is fighting to ensure your voice is heard in these critical policy discussions.Join us and tell your elected officials to protect your right to fly.
Get your Part 107 Certificate
Pass the Part 107 test and take to the skies with the Pilot Institute. We have helped thousands of people become airplane and commercial drone pilots. Our courses are designed by industry experts to help you pass FAA tests and achieve your dreams.

Copyright © DroneXL.co 2026. All rights reserved. The content, images, and intellectual property on this website are protected by copyright law. Reproduction or distribution of any material without prior written permission from DroneXL.co is strictly prohibited. For permissions and inquiries, please contact us first. DroneXL.co is a proud partner of the Drone Advocacy Alliance. Be sure to check out DroneXL's sister site, EVXL.co, for all the latest news on electric vehicles.
FTC: DroneXL.co is an Amazon Associate and uses affiliate links that can generate income from qualifying purchases. We do not sell, share, rent out, or spam your email.


