
This fortress has stood here for more than a thousand years. It has survived wars, changing empires, earthquakes, harsh winters, and generations of people who walked through these gates. And despite all that, time is still winning. Every year, little by little, history disappears. Stones erode. Walls collapse. Details are lost forever. And once they’re gone, all we’re left with are photographs and stories.
But what if we could actually preserve a place like this, not just as photos and videos, but as something that future generations can explore in three dimensions? This is where Project Eternal comes in. It’s a collaboration between Insta360 and Antigravity, and I’m super happy to be part of it because it holds a dear place in my heart. This video was made in partnership with Antigravity, so consider this a sponsored project — but the flight, the model, and the opinions here are mine.
Introducing Project Eternal
Being able to participate in a project that aims to preserve the historical meaning of landmarks across the globe is such a valuable and meaningful thing that I’m just super excited for this one.
The idea is not to replace museums or restoration work. It’s to create a digital archive so detailed that future generations can continue exploring these places even after we are long gone. And honestly, I think this is a beautiful idea.
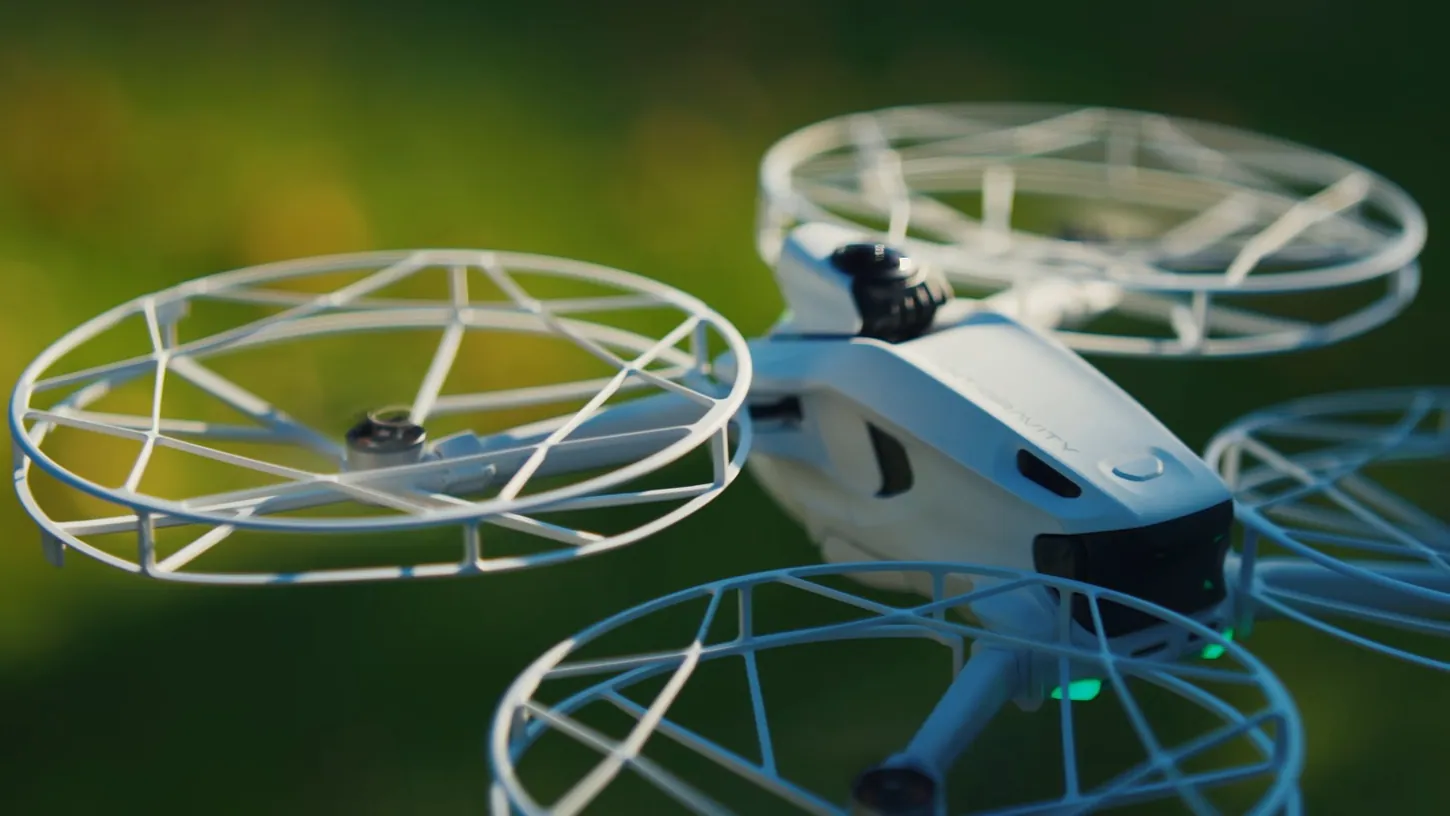
This is where things get really interesting, because for this project I’m shooting with the Antigravity A1, a 360 drone that captures the area all around it, giving you the flexibility to look around and preserve details that you might normally miss. It also collects the visual information that’s very much needed to create a 3D model of the exact area.

The Drone I’ll Be Using
This is Ovech Fortress. Standing on top of this limestone plateau, it’s easy to understand why this place was so important centuries ago. Whoever controlled Ovech Fortress also controlled the surrounding region. This wasn’t just another castle. It was a strategic fortress, a home, and a witness to centuries of Bulgarian history.
Before I start the actual collection of data, let me quickly give you a rundown of the A1 and how it works, because if you’ve never flown a 360 drone before, it can be quite a different type of flight than anything you’ve experienced. Let’s just take a look around. Oh, this is the sketchiest part, when you look down.
First off, we have this joystick here to control the drone, which is also where we have the throttle. When we press it, we can control the drone in all different directions and position it wherever we want it to go. And because we have two different cameras here, they are capturing 360 video, which means all the different angles and all the different directions are being captured at once. So you don’t necessarily have to worry about perspectives and angles. That makes it a lot easier and a lot more enjoyable, I would say.

How To Capture The Footage
So how do you actually use a drone like this to capture an entire building in 3D? Well, the process is actually super straightforward, as soon as you understand the basics you need to follow in order to gather enough information to create that 3D model.
The first thing you need is coverage. Instead of thinking about different perspectives as you would with a regular camera drone, with a 360 drone like the Antigravity A1 you mostly need to worry about just passing enough times around the areas you need to capture. The rest will be handled by the 360 footage you’re actually recording.
If you are a little bit more advanced, you can use the joystick to manually control the drone and fly it yourself as many times as you wish, passing around all the important objects in the area. Or, if you don’t feel comfortable with that, you can set a flight path mission, which will do that for you. You select the path the drone will take and it will fly it automatically, without you even watching it. It’s a very, very easy way to do it.
I personally love to be involved in the whole creation of the 3D model, so I wanted to manually fly this drone to capture all the information. But keep in mind, you can also do it automatically with the A1 without having to fly it yourself.
I’m also keeping the flight very slow and stable, because Antigravity recommends a maximum flight speed of up to 5 m/s to avoid motion blur and less-than-ideal-looking objects when you fly a little bit faster. You might blur some of the objects you’re passing at a very close distance, and that will result in a worse quality 3D model afterwards. So, in order to have the best-looking 3D model, I kept my speed a little bit slower than usual and just tried to enjoy the scenery.
Once I covered all the different parts of the fortress, the footage can then be used for creating a 3D Gaussian Splatting model, which is where all the videos and the different perspectives we shot start to take shape and can be used for the final model. And all of these different perspectives came from just one flight.

3D Gaussian Splatting Model
That’s the beauty of 360 video. It’s all up to you to decide which perspective, which angle, and which way you want to go when it comes to selecting the final result of your flight.
You’ve probably heard of photogrammetry before, where the software builds a 3D model from hundreds of thousands of photographs. As a matter of fact, I’ve made videos on creating a 3D model from photos in the past. But Gaussian Splatting takes a different approach. Instead of creating traditional polygons and textures, it reconstructs the scene using millions of tiny points that capture how light behaves in space.

The Flight
It is around 30°C, so obviously not the best time for something like this at 10:00 a.m., but hopefully the result will be worth it. They seem to be doing a little bit of reconstruction here, changing some of the wooden planks on the bridge, but this shouldn’t be a problem. So we’re ready to go. Let’s start the flight.
We got the drone back after a full flight with many different routes. I’m super happy with how everything turned out. This place is absolutely beautiful and I cannot wait to see the results.

The Finished 3D Model
And this right here is the finished result. This 3D model has been made by Splatica, a company with over a decade of experience in 3D reconstruction and computer vision. With just over 10 minutes of footage, this is the model we have.
Since I’m recording my screen, I switched to SD, but keep in mind there’s also an HD version with a lot more detail you can examine. I just want to keep it a little lighter so I can show you more.
As you move the mouse around, you can take a look at pretty much all the details I recorded with the Antigravity A1. If we take a closer look at the bridge, we’ll see that this is the more detailed part of the whole model. Obviously, this is where I flew the most and made multiple passes to gather enough information. If we look at the area where all the houses and buildings are, we’ll see they are a lot less detailed. We don’t have that many details from them since I didn’t fly there.
It’s super cool to take a look around. You can use the keys on the keyboard to change direction and move around in space, and it’s like a little game. You can explore a lot of the area either with the mouse or the keyboard. It’s really up to you. You can move around, explore, and visit this place from your browser. There’s also an option to show or hide the camera trajectory, so if you want to see where the drone has been, you’ll be able to do that.

You can explore the Ovech Fortress 3D Gaussian Splatting model on Splatica yourself and examine the whole area as much as you want.

Final Thoughts
I want to thank you so much for watching all the way through, and special thanks to Antigravity for working with me on this project, as it’s been a very interesting topic to explore personally.
If you want to get an A1 drone yourself, start flying in 360, and explore 3D modeling with Splatica, they’re currently running a big discount sale of up to 25% off on the A1. They also have service centers in Europe and North America, so you don’t have to worry about any of that.
This article is based on a video from our YouTube partner Mihail Svilenov. Watch the full video on the Drone Supremacy YouTube channel, and find more of Mihail’s work on his DroneXL author page.