DJI Air 3S Beginners Guide: Features, Setup, and First Flight
Check out the Best Deals on Amazon for DJI Drones today!
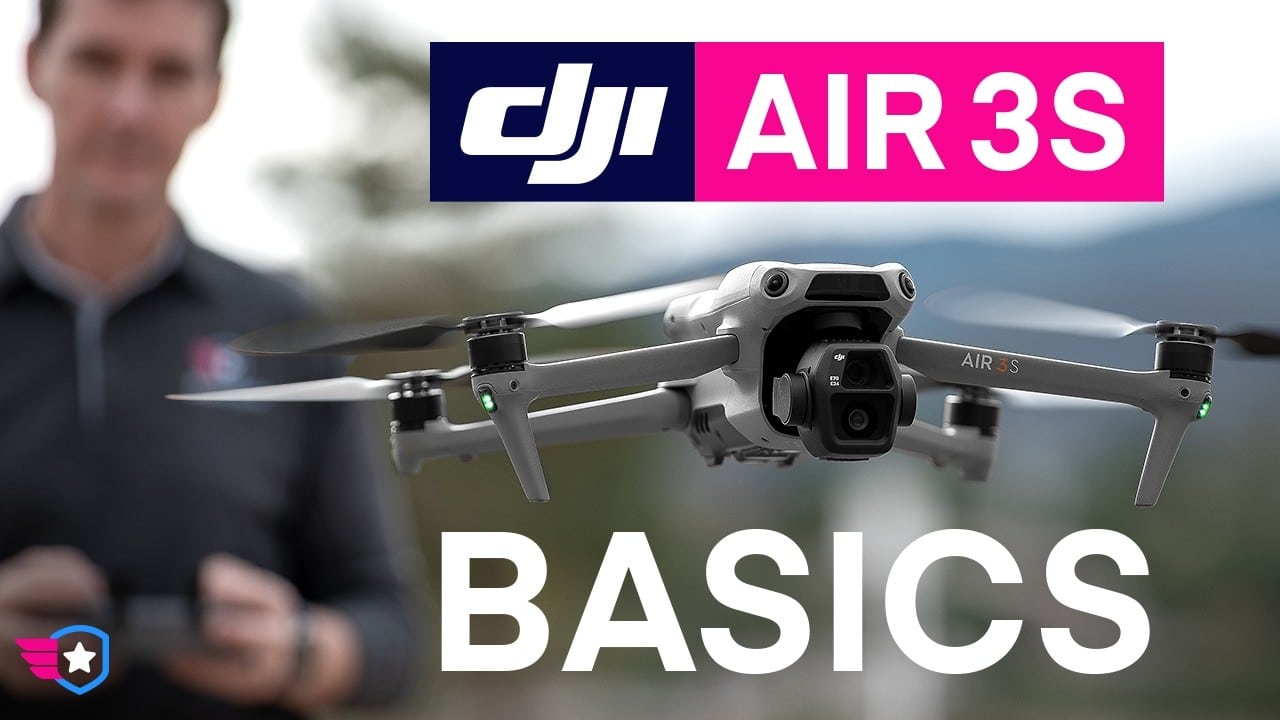
In today’s video, we’re going to be doing the beginner’s guide to the Air 3S, covering all the new features, all the upgrades, and how to get started with your first flight. Let’s get to it.
DJI Air 3S improvements
Looking at the aircraft, there are a couple of new things that are improved from the Air3, which is the little brother. Starting with the sensor right here in the front, this is a 50 megapixel instead of 48 megapixel, f/1.8 although the Air3 was f/1.7.
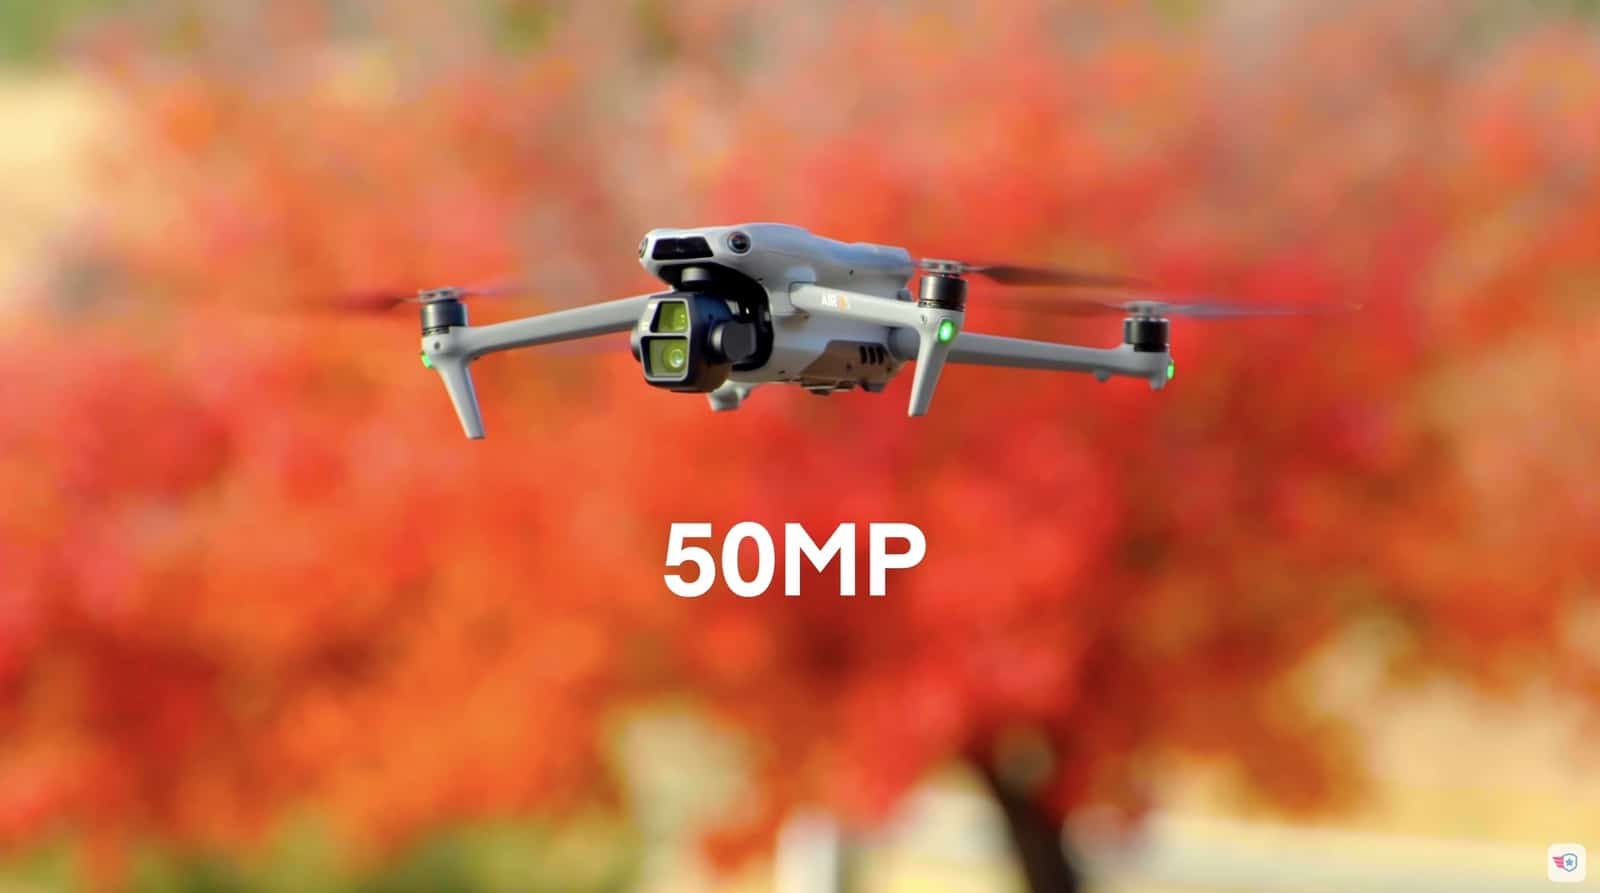
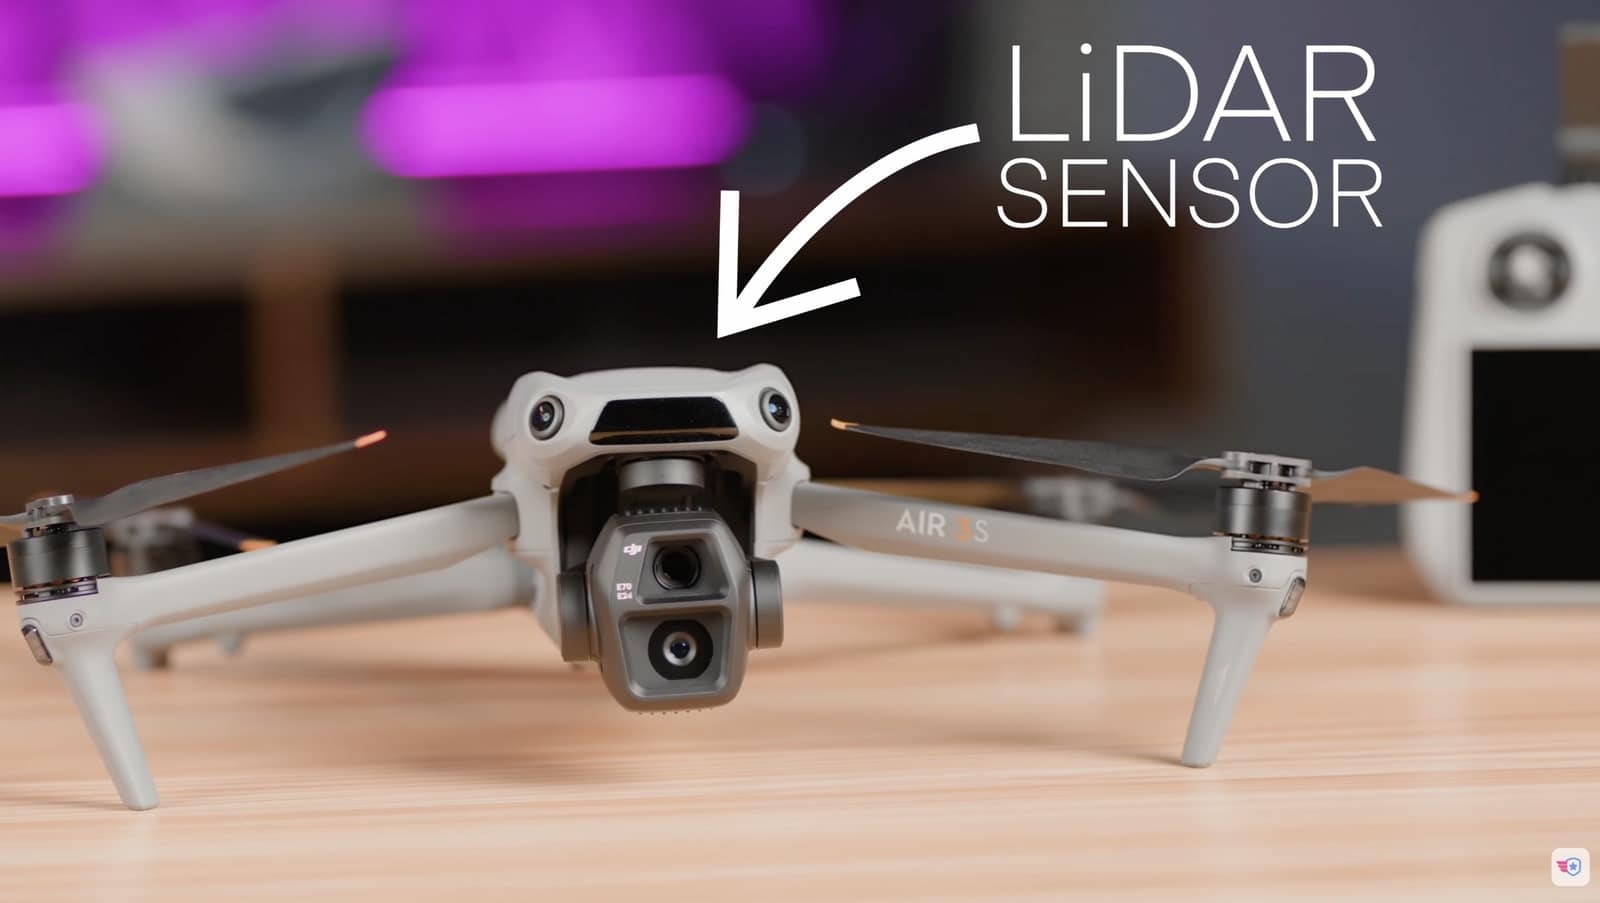
The filters, if you’re wondering, do not fit if you have Air3 filters. These are brand new filters because it’s a new form design. Now as far as the front, you can see that we have this solid black bar which is our obstacle avoidance system, which now uses LiDAR. The functionality is exactly the same except the technology is a little bit different, so this is supposed to be getting better obstacle information compared to what we had before, which was using just cameras.
When we move to the back of the aircraft, we have internal storage much, much, much larger than what we’ve seen before – 42 gigs of internal storage compared to the Air3 (I actually don’t remember what it was, but I think it was a lot less). The battery itself is exactly the same as the Air3, so kudos to DJI for doing this. That’s not very common for them to actually keep the same battery from model to model. Same for the propellers – you can actually reuse the propellers as well. So all in all, this thing is a great little package, a great extension to the Air3.
One of the big advantages of the LiDAR is that in low light conditions, this will be a lot better because it doesn’t need the light like typical sensors do. Also, as far as return to home, we have the advanced return to home which is a bit smarter than it was before, where it’s going to be able to find the most optimal way of getting back to the user when the battery goes low or when you lose the signal from the controller.
DJI Air 3S Flight Time
As far as flight time, the only downside is that people have been reporting a little bit less flight time. From our testing, we had a minute and 40 seconds less than the Air3 in the same exact environment. Now is that noticeable? I don’t know. I think these batteries are so big these days that you get plenty of flight time, but I’m going to let you decide if this is something that you can hold against this new
Before we get to the flight, we’re going to be talking about the controller. Today we’re going to be using this right here, which is the RC2 controller with the screen. We can also use the RCN2, which is the one without the controller, or the new RCN3, which is basically the same thing with a smaller battery. Those will require you to plug in your phone if you want to see the footage going on on the drone.
Now here what we’re going to do is take a look at the front of the controller. The buttons on the outside – on the very top you can see that we have a CN and S button. You want to make sure that you’re in the proper mode. In this case, we’re going to do N for normal. S would be for sport mode, and C would be for cinematic. So I’m going to keep it on N right now, and there’s a couple things in here that I want to make sure that you check before you take off.
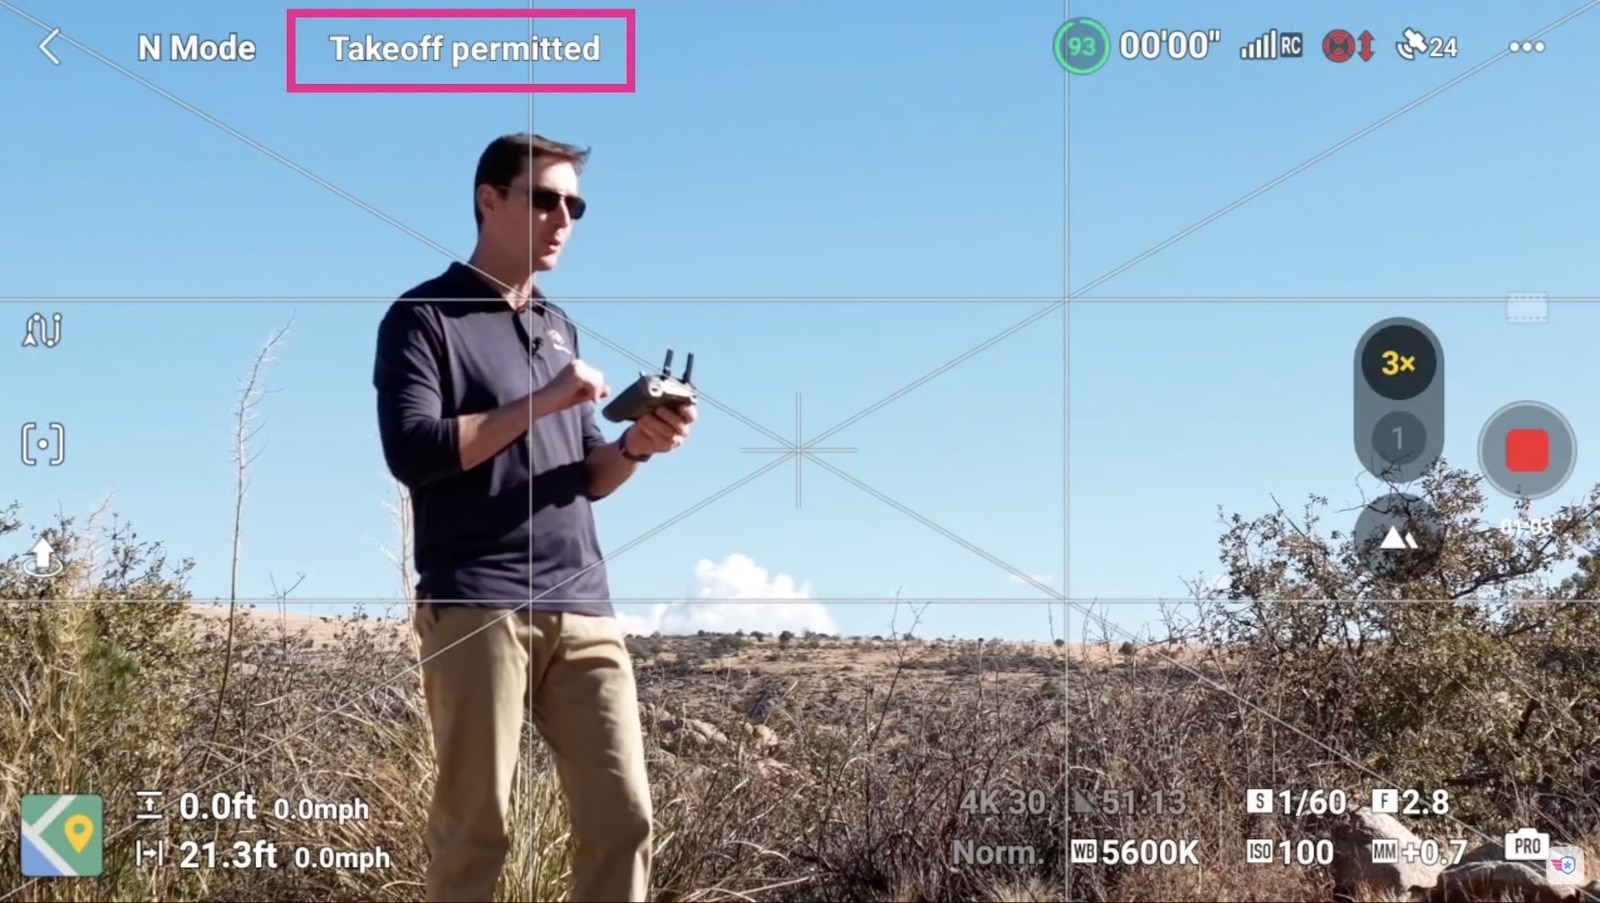
The best way to do this is where you see where it says “take off permitted” right here. I’m going to tap on this and now we have a flight checklist showing up. On that flight checklist, what we have is remote ID functional, which is something that we want to check, and then also it says RTH altitude. So you’re going to look around yourself and make sure that all of the data here kind of matches maybe the tallest tree or the tallest building that you have around. We don’t have a whole lot – I’m at 180 feet. I’m going to keep it right there because it’s safe.
We have our maximum altitude as well. Now for some reason, ours is set to 295. I’m actually going to put mine to the maximum here. It’s going to give me a warning – I’m going to say okay because from time to time we want to fly higher than 400 feet from the takeoff point, which is right here, because we have terrain near us. If you live in a flat area and you don’t want to exceed 400 feet, you probably want to set that at 400-450 feet just to stay within limits.
Also, our maximum distance – I’m going to keep with no limit right here, so that’s good for our pre-flight checklist. Another thing that I want to do is click on the three dots on the top and take a look at our bypass or obstacle avoidance setup. Right now we have it on bypass, which is great. I’m going to keep it as it is, but you could also turn that off if you wanted to. And then as far as the RTH, we have it set to Optimal. You’re going to keep it right here – it’s a good way for the drone to come back and use the most optimal route to get back on track.
Then what we want to do is go into our camera settings. We’re going to be doing a video today, so I’m going to set it up so that we have our settings set correctly. You can click on the bottom right corner right here, or you can click also in the top right corner and then go to camera in the settings. Here you can see now I’m in the middle of recording because we are doing this for this video, but you can see we can change our color settings to HLG, D-Log M. We’re shooting in normal right now.
You can change the encoding format, and then you can also add your histogram or your peaking levels – everything that you want to see on the chart. I like to have the grid lines in here available. That really helps me to frame my shots. Then your white balance – I recommend getting off of the automatic white balance. We set ours to 5600 so all of our cameras match. This is just a personal preference.
Then check to make sure that we are recording to the SD card if you have one in here, but you also notice that the
First Flight With Your DJI Air 3S drone
From here we’re going to be ready for the flight, but before we do, I want to do a quick brief of the weather and the airspace nearby, and then we’ll be ready to go. As far as pre-flight, we’re going to be looking at two different things: the weather, which is pretty simple to do – you can use an app if you want, but just look outside, see if the wind feels like it’s really moving you around, in which case you don’t want to fly. But otherwise, here we’re doing pretty good.
The second thing is going to be your airspace. Now you can download an app called Aloft Air Control where you’ll be able to see if you need approval, and if you want more information on how to do that, you can click this video right here and we’ll get you all the details that you need.
A few more things to do before we take off is to make sure that your propellers are attached correctly so make sure they’re not going to take off as soon as you spool the motors. Also turn on the drone – double tap and hold in the back until you see the full lights in the back of the drone. We’re going to put it down in order to get our satellite reception and double tap and hold on your controller as well to turn on, and then eventually you will see that we have enough satellites to take off.
Now I cheated – I turned it on already before we started so I have 28 satellites. You can see that in the top right corner, so we are ready to go. So what I usually do is I look around, make sure that there’s nobody running towards the drone or nobody in the area. I’m basically going to call spooling and then taking off. So I’m going to look at the drone as it takes off, get away from you guys, and then we’ll get this thing up in the air.
Home point updated. Out of the way right here. Alright, so the drone is a little further away from us right here. I’m going to get away from these birds because there were some big geese back there, and there we go.
Now from here we can go and take a look at the settings that we’re going to be using in order to record. By default, the drone is going to be set up in camera mode unless you used it recently to do videos, in which case if you want to switch between the camera mode and the video mode, you can just push on this red button here and then it’s going to switch it to the camera mode, and if you push again, it’s going to start recording.
On the bottom right corner, it is likely going to be set up in auto mode to get started. You can push on that auto mode and change it to our manual mode, which is called pro mode. Now from here you can change some of the settings. You can click on the left side here and see I have my white balance set to manual. We’re going to be recording at 4K 30 frames per second, but notice that you can go all the way to 4K 60 in normal mode. In slow motion mode, you can also go all the way to 4K 120. I’m going to keep it at 30.
Then as far as the color science, we like using D-Log M, so we’re going to be using that, but for most people, the normal mode is probably just fine. Then make sure you have it set to H.265, although in D-Log M it’s going to be automatic, and then MP4. And make sure you have the right storage area – in this case, we’re recording to the SD card.
On the right side, you have your actual shutter settings. We can set it to Auto, but right now I have it in full manual – ISO 100, 1/100 on the shutter speed even though by default we should be at 1/60. I have an ND32 on here. I’m actually going to bring it up a little bit because I was on the ground earlier and that was a different setting. So let’s adjust it – 1/60 is technically the proper setting for 30 frames per second (you multiply 30 by 2 = 1/60), and because we’re shooting in D-Log M, I’m going to overexpose it a little bit. You can see the plus one down here. If you were in normal mode, you want to have it at plus zero on the exposure compensation.
Our camera is pretty much set up – we’re ready to start recording. Now I mentioned the slow motion mode – if you click on the button right up here, it will show you how to get to the slow motion mode right here where you’ll be able to record at whatever speed you want. I’m going to go back to normal because we don’t need to go too crazy with the speed unless Ben wants to start running right here on the edge and chasing those geese, which would be fun.
Now one of the cool new features of the
Another cool new feature with this drone is the ability to do what they call a free Panorama. In the past, you were stuck with having to do either a 180 or to do a full sphere. In this case, you can actually select the picture in the top left corner and in the bottom right corner of the panoramic that you want to shoot, push start, and then it’s going to compose the panoramic all by itself.
Another feature that you can use is doing a full orbit around an object, but you can also do that by hand, and I’m going to show you how to do it because it’s fairly simple. We’re going to be using the yaw on the left side here and we’re going to be doing an orbit to the right, so we’re going to be using the right stick going to the right and the left stick going to the left at the same time. You can see as I’m starting to turn and rotate around the object, I’m going to put a little bit more yaw there we go and get established.
Once you have the right speed, all you have to do is maintain this into your rotation. Now you will need to use the right stick to go forward a little bit as well at the same time in order to not get too far away from your subject, but it’s a little bit of left stick, a little bit of right stick to the right, and right stick forward. Then now you can see we’re going to go right into the sun right here on this object, and there we go.
You want to keep it right in the center as you go around your object. Very, very easy to do and with a little bit of practice, you can do as good of a job, and you can even get out of it right here by removing the rotation and then going away from your subject and then climbing again. Look at that – it’s a beautiful shot that you wouldn’t be able to get with the automation and frames your subject really, really well. Look at that, and then we’re going to reveal the rest of the lake.
Now if you wanted to do this with the automation, you would have to go on the screen, highlight your subject – hope that it picks it up – it did right here, it recognized that was something – and then push on POI (Point of Interest). Now you can select the direction in which you want to go, which is to the right, slow or fast, and then now – oh, subject lost, see that? Subject is pretty small. I don’t want to get too close to them because I don’t want to bother them.
There you go – it knows actually that it’s a boat, it’s really interesting. It has a little boat symbol. So again, we’re going to do that again – push POI and now go in the direction where we want to go to record, and then now as fast as we want to go, it will rotate around the object. I think we can also move the camera to the bottom. Yeah, there you go – move the camera down a little bit so it’s right in the middle.
If we wanted to go faster, we would do that by moving the arrow to the right a little bit more, and then there you go – you have your object being recorded. We’ll see which one looks best – my shot or the automated shot. At the end of the day, you can also climb and descend with this one by adding more altitude here by giving it more power or descend a little bit more and then getting further away from it by going back on the right stick and then giving it a little bit of a wider orbit distance. When you’re done, you can simply push stop – the big red stop button – and then move on with your next shot.
Another cool feature that we can use is the Active Track, and you notice here we’re pretty close to a double-lane highway, and you can see I can select any of the cars. A little plus sign – I can tap on them. Now I went to the 3x. See this car is coming here – we’re going to pick it up. I’m going to push the plus button. It’s now picking it up. I’m not doing anything right now, and it is keeping track of the vehicle as it moves around.
Now I could technically go and follow it by going a little bit faster. I’m going to move to sports mode here and see if we can actually kind of go and follow it at the same time, making sure that we don’t hit any obstacles, but look at how beautiful this looks. I can keep climbing at the same time. All I have to do is really fly my drone and it’s going to keep it in the frame as it goes until, well, we are still within visual line of sight.
So I’m going to stop right here, not touching anything, letting it go around the roundabout right here and do its thing. It’s actually extremely powerful. So you could do this with a car, a boat, a person, somebody on a bicycle, on a motorcycle – whatever you want to do. This is a great way to do it and keep the object right in the track while you fly the drone and pay attention.
And you notice as I say this, we have another feature which is really cool, which is “manned aircraft nearby.” We are pretty close to an airport. We are cleared all the way to 400 feet. There’s another airplane nearby. I am nowhere near where they would be, but you would want to be looking around to see if anybody is coming in your airspace. I can see my drone, I can see around us, I don’t see anything. I can see the airplane right here actually, so not a factor, but it is actually fairly close because it is visible to us, so we would be able to avoid it if we were getting any closer than that.
Another cool feature that we can use is active track, and I know I’ve said “cool feature” quite a bit because, well, this drone has a lot of cool features. But you notice here we have Michael in the shot, and I’m going to push on the plus button, so it’s going to recognize him as being a person right here. And on the bottom of the screen, we can push on active track, and now what it’s going to do is – you notice it’s going to get behind him – and now I can move where the camera wants to go.
So I can drag and drop where I want the camera to go, and it’s going to keep doing and following him. Look at that beautiful to the side. If I wanted to go right in front of him, I’m going to go right in front of him and the camera is going to move as he’s moving and then reveal the shot. I can do that, I can also go lower or higher on my screen depending on what I really want to do here, and I can go on the inside shot. You can see there’s an outside wheel and an inside wheel, and you notice how now it’s getting a little bit closer to him. I can go a little bit closer to him behind him as he moves around. Look at that and then revealing and basically following him.
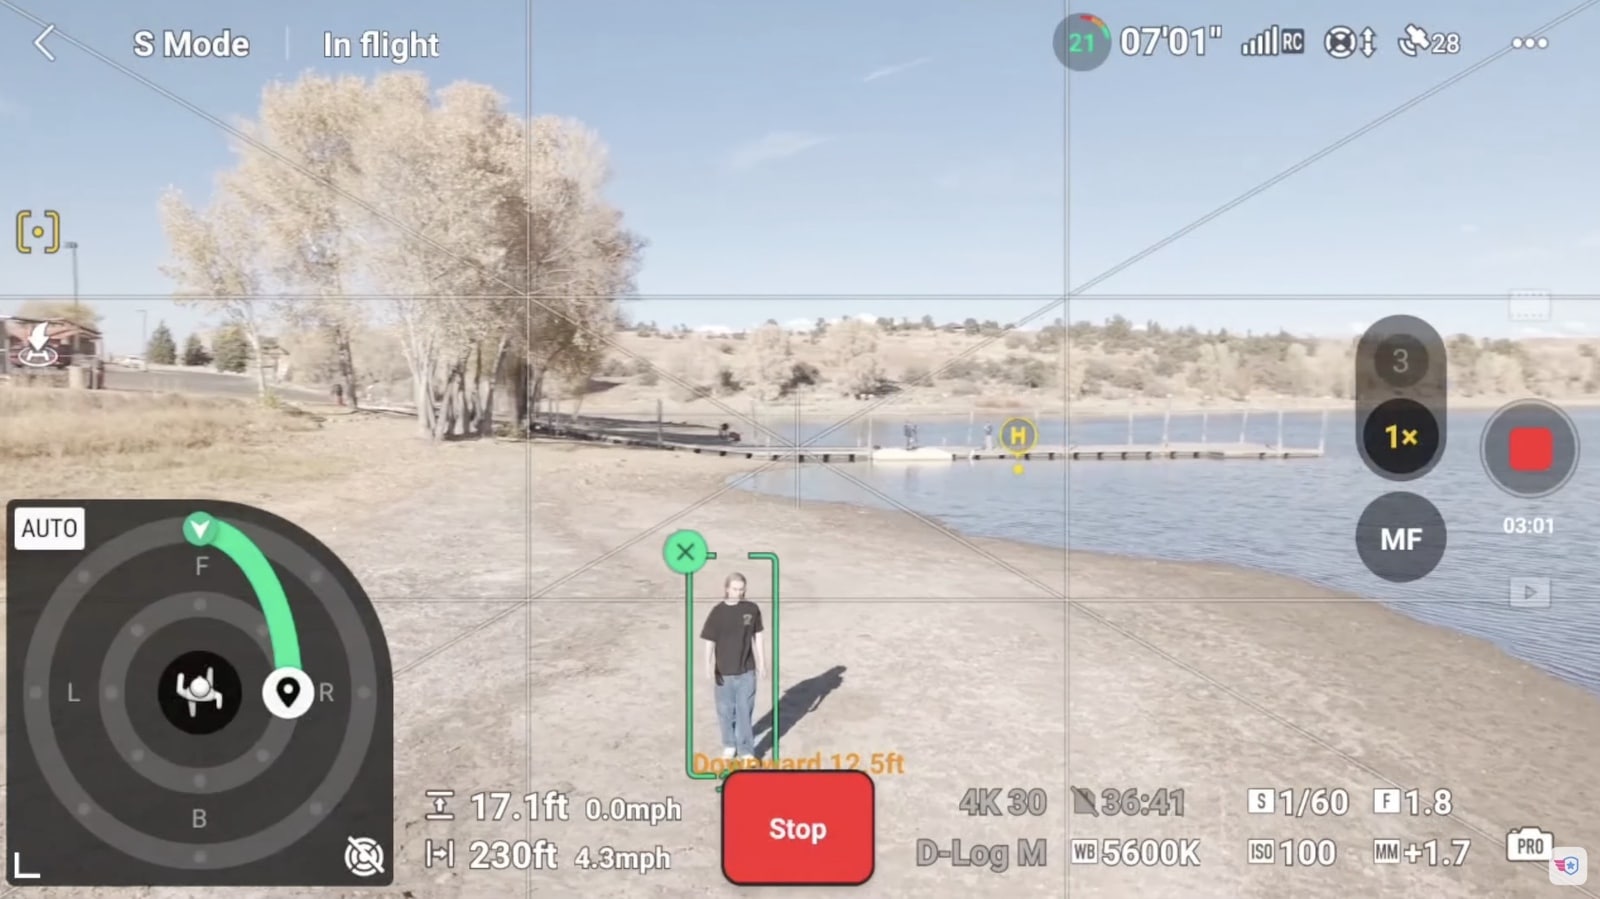
Now if you were to run or be on the bike or do something a lot quicker, we can still continue to do this. Now he’s going to turn around. I’m not going to change anything. I’m still asking the camera to go behind him so it’s going to wait for him to go right this way and then boom, it’s going to position itself right behind him as he moves back towards us. Or I can decide to go forward in front of him, and there you go – the camera is now moving, going to the right and coming right in front of him.
Keep an eye on obstacles obviously as you’re doing this. The camera should be able to avoid all of these obstacles nearby us, but it’s always a good idea to pay attention. So I’m going to go to his right right here, and when you’re ready to end it, you can simply push on stop and then the aircraft is going to stop right where it is, and then we’ll be able to do something else. Now it’s still selected so the camera is still moving like a tripod as it’s following him – just that spotlight – but that’s it, it’s not going to keep moving forward or back or to the side.
Let’s go ahead and take a look at return to home (RTH). Our battery is actually getting pretty low – we have 4 minutes left. We just got a warning – I canceled it, but what I’m going to do is push the home button here and hold it. You’re going to hear the controller beeping “return to home,” and now it’s going to return to home. Not only that, on the screen you can see that it is telling us exactly where it’s going to go in 3D – it’s actually really cool.
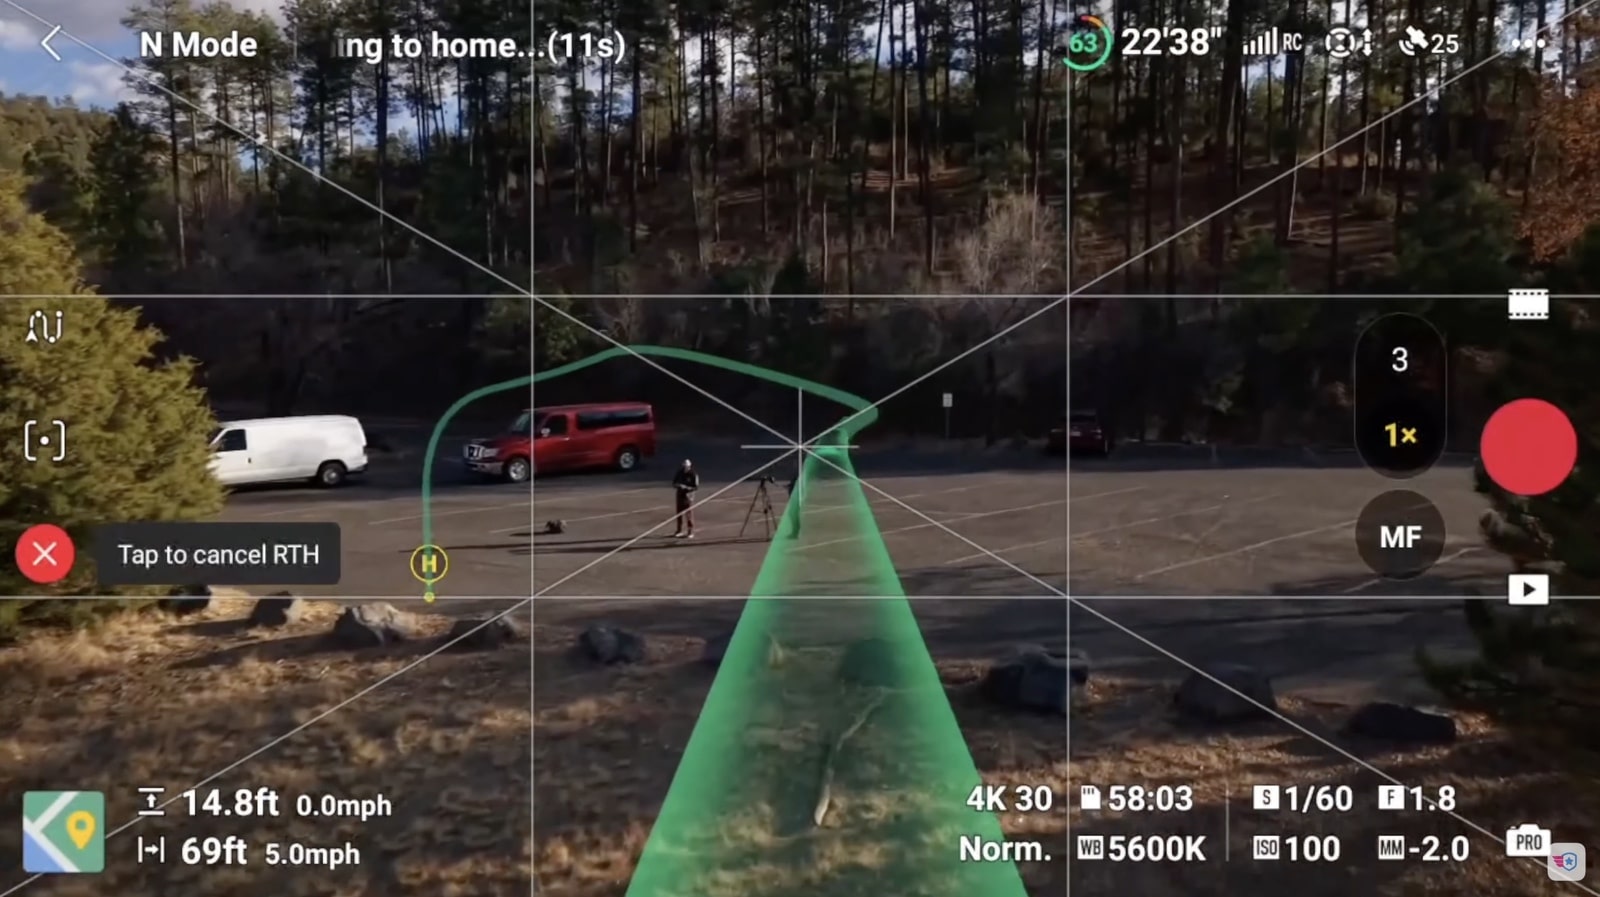
And I can see the drone right on top of us here getting slower and slower, and look – it’s going to go and land right on that path right behind me or right next to me. And yeah, there you go, right where we took off from. You want to make sure that you keep an eye on the drone, especially when you’re over half water like we are right here, but look at that – it’s doing a great job coming in to land.
You can always push any buttons if you want to cancel this or do it by hand, but look at that – it’s going to be landing all by itself. On the screen it looks like we’re landing on water, but for real we are landing on the pier, and there you go. I did not touch anything. The drone is back safely. Warning: we are at critical battery voltage so we have only a few minutes left. We pushed it a little too long – I don’t recommend going to that level if you can avoid it.
If you have any questions about the
Discover more from DroneXL.co
Subscribe to get the latest posts sent to your email.
Check out our Classic Line of T-Shirts, Polos, Hoodies and more in our new store today!

MAKE YOUR VOICE HEARD
Proposed legislation threatens your ability to use drones for fun, work, and safety. The Drone Advocacy Alliance is fighting to ensure your voice is heard in these critical policy discussions.Join us and tell your elected officials to protect your right to fly.
Get your Part 107 Certificate
Pass the Part 107 test and take to the skies with the Pilot Institute. We have helped thousands of people become airplane and commercial drone pilots. Our courses are designed by industry experts to help you pass FAA tests and achieve your dreams.

Copyright © DroneXL.co 2025. All rights reserved. The content, images, and intellectual property on this website are protected by copyright law. Reproduction or distribution of any material without prior written permission from DroneXL.co is strictly prohibited. For permissions and inquiries, please contact us first. DroneXL.co is a proud partner of the Drone Advocacy Alliance. Be sure to check out DroneXL's sister site, EVXL.co, for all the latest news on electric vehicles.
FTC: DroneXL.co is an Amazon Associate and uses affiliate links that can generate income from qualifying purchases. We do not sell, share, rent out, or spam your email.


