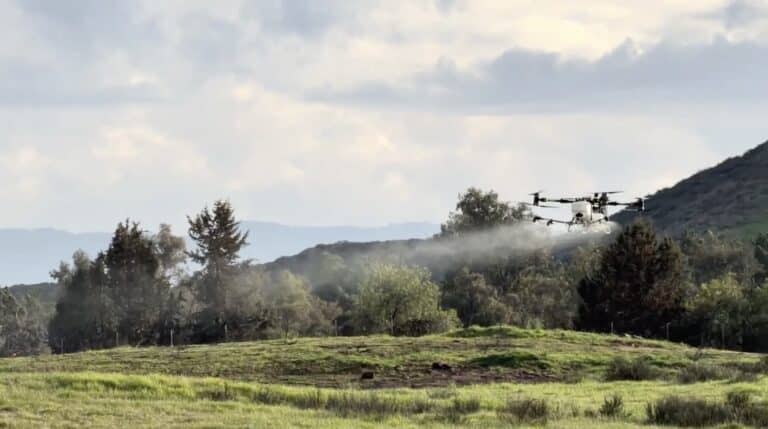
How To Take EPIC Hyperlapses With Your DJI Drone – Full Tutorial

Check out the Best Deals on Amazon for DJI Drones today!
What’s going on, guys? Billy here, and welcome to my complete guide on how to create epic hyperlapses with your DJI drone from start to finish.
One of my absolute favorite things to do with my drone right now is to capture hyperlapses. It’s been a built-in feature in DJI’s drones ever since the DJI Mavic 2 Pro, and it has come pre-installed in every drone they’ve released that has obstacle avoidance sensors.
Hyperlapse tutorial video
What is a hyperlapse?
For those of you who might be unfamiliar, a hyperlapse is essentially a moving time-lapse that captures photos over a specified duration at a very slow speed.
Once you combine these photos into a video, the drone, in this case, will appear to be flying at a normal speed, but all the motion in the video will be moving really fast. This exaggerates the movement in the frame, giving you a really awesome effect.
I admittedly haven’t posted many hyperlapses here on my channel, as they’re usually shorter videos, so they live over on my Twitter and Instagram. If you follow me on either of those platforms, my username is @BillyKyle.
You probably saw last year that anywhere I traveled to, I found somewhere to capture one of these hyperlapses. It worked out great because I had the RAW photos to save as a still image and the moving video, the hyperlapse, to share as a reel or post on Twitter.
These here are just some of the examples that I’ve captured so that you guys can get an understanding of what we’re striving to create here with this tutorial.
While some might think that creating one of these hyperlapses is super easy because it’s an automated flight feature, and the drone does all the flying for you, you’ve got to think again.

Lot of steps to create one smooth hyperlapse
There is so much work that goes into making a hyperlapse look like one of the ones that I just shared with you. There’s a lot of time spent planning the mission, and you’ve got to let the drone fly the mission. You’ve got to manage all the files, post-process, edit the photos, and edit the video.
There’s so much that goes into making just one hyperlapse; it can take hours to get that final result. But I think it’s worth it because the end result looks awesome.
In this video, as I mentioned, we’re going to go through the process from start to finish of how to create one of these hyperlapses. So you guys better get ready because this is going to be one long tutorial.
Hyperlapse workflow from start to finish
This here is the workflow from start to finish: we first go through a planning stage, then set up our mission, fly the drone, touch on some best practices for file management, edit the photos, and finally turn those photos into our final video product – the hyperlapse.
When it comes to the planning stage, the first thing we need to think about is our subject. Where are we going to fly to capture our hyperlapse?
We need to make sure that the location we choose has plenty of room so we can freely fly our drone over a long distance, and that there’s a lot of motion in the frame.
Subject matter is important
Things to look for include a busy highway, a bustling interstate, a busy waterway with lots of boats frequently passing through a channel or a bay, or clouds rolling over a city skyline.
There are so many areas with a lot of motion; you just need to make sure that you can make your hyperlapse unique. You need to ensure that it can stand out, and the best way to do that is to capture a ton of motion and cram it into the frame to really exaggerate that movement.
For example, I was able to capture this shipping port just south of New York City on an active day, which made for some of my favorite hyperlapses that I’ve created.
There’s just so much going on here, from the crates being moved to the forklifts moving around, to larger machines operating throughout. These are the unique opportunities that can really make for the best results.

But don’t get me wrong, I still love capturing a good city skyline with traffic whizzing by on the highway.
So, subject matter is really important because you could take your drone out and try to capture a hyperlapse of an empty field on a nice sunny day with no clouds, and you’d just be better off capturing a video because there’s no motion to be exaggerated within the hyperlapse.
You want to make sure that your subject is right for a hyperlapse, and you want to make sure that you can find as much motion as possible. I don’t know how many times I could say that; to me, it’s the most important thing.
Hyperlapse settings on your DJI drone
Okay, now moving on from here, before we actually get into setting up our mission and flying the drone for our hyperlapse to capture the photos, we need to make sure that we set a couple of our settings correctly for the best results.
There really is only one thing in particular that I want to point out, and that is the saving of the raw photographs. So, under “Original,” you want to make sure that this is set to “Raw.”
You can also set your output to be in 4K, so you have the highest resolution preview. This is the hyperlapse that the software automatically creates for you, but we aren’t going to be using that because we’ll get the best results by making our own with those raw photographs.
That pretty much concludes our planning section: find your subject, make sure your settings are set properly, and you’ll be good to go.

Mission planning process – four different flight modes
Okay, now it’s time to move into the actual mission planning process. We’re going to cover the four different flight modes that DJI offers within the Fly and Go application, and those are:
- Free,
- Circle,
- Course Lock,
- Waypoints.
To enter the hyperlapse flight mode, we’ll select the shooting mode icon just above the shutter and record button.
From here, we will select “Hyperlapse,” which allows us to choose between the four different hyperlapse flight modes. To dive deeper into each of them, “Free” allows you to freely fly the drone as you wish while the camera captures pictures.
Pick the duration for your hyperlapse
From the initial drop-down menu, you can choose your shooting interval, which determines how often the drone takes a photo. You can also choose the duration of the final hyperlapse, up to 30 seconds, which indicates how many total photos you’ll end up with.
Additionally, you can change the speed, so the drone won’t fly too fast. You typically want to be flying slower to capture a better hyperlapse.

Free hyperlapse mode
Within “Free,” you have the ability to change the altitude, position, and rotation. You essentially have full control over the entire drone, but the controls are just dampened to the max speed that you have set.
Now, I usually don’t use the “Free” hyperlapse shooting mode, just because I feel like it’s tedious. I mean, you could be having your drone fly for upwards of 20 or even 30 minutes, so could you imagine having to pilot the drone for 30 minutes straight at a slow speed? I just feel like that would be maddening.
I do think that it’s crucial that “Free” is included here as an option for those who want to make use of a more precise version of flying and capturing a hyperlapse.
You could also use it to actually capture still time lapses, so you could do a “Free” hyperlapse and just let the DJI drone sit there for a standstill time lapse. It is good for a couple of things, but again, it’s just a hyperlapse feature that I don’t often use.

Circle hyperlapse mode
The next hyperlapse flight mode is “Circle,” which automatically flies in a point-of-interest style orbit around an object that you select.
To begin, you’ll want to use your finger to drag a box over the subject that you want to orbit. This will highlight a green box around that subject.
From the drop-down menu, you can set the shooting interval, which determines how often the drone takes a picture. You can choose the duration of the final hyperlapse, indicating how many total photos you’ll end up with.
You can set the speed that you want the drone to fly on its autonomous point of interest mission, and finally, you can choose if you want your drone to fly in a clockwise or counterclockwise direction around the subject that you’ve selected.
Once you have your settings set and you press “Go,” the drone will briefly move in the direction that you have set to calibrate the drone’s understanding of the subject that you’ve selected.
After doing this for a few seconds, it’ll begin its shooting process. “Circle” is a great option to use when capturing a hyperlapse, but personally, I feel like it’s a little bit one-dimensional, as the drone is just orbiting around your subject.

It would be so much more dynamic if you could change the altitude or change the gimbal pitch. I just feel like you could add so much more movement to that frame.
To give you an example of what I’m talking about, here is a “Circle” hyperlapse, which looks great in this scenario. I had a lot of cloud movement, which was the real subject that I was trying to capture, despite the awesome mountains here in Sedona.
But if we look at this different hyperlapse using the “Waypoints” flight mode, I was able to further customize my drone’s movement by increasing my altitude and pitching the camera down along my flight path.
This, in my opinion, made for a much more dynamic result around the skyline of Dallas. I’ll touch more on this as we get to the “Waypoints” flight mode here in just a few minutes.
Really quickly, though, before we move on, just as a pro tip, I’d recommend setting your subject area to be much larger than you think you need. I’ve found that I get a far better final product that is more smooth and stays more accurately set on what it is that you’re trying to trace.
For example, when orbiting the skyline of Philadelphia here, I wouldn’t select just the Comcast Tower in the center, even though that is my main subject. I’d instead select the entire skyline to ensure that the camera stays focused on what it is that I want to capture.

Course Lock hyperlapse mode
Now, the next flight mode that we have is one that I use very frequently. It’s called “Course Lock,” and it does exactly what you think it would: it flies along a straight path and captures photos to create your hyperlapse.
You can then rotate your drone in the direction that you want it to face and change your gimbal pitch to further customize your flight.
Now, the first step to setting up this flight mode is to point your camera in the direction that you want it to fly and then press the lock button. You can check your course on the map to make sure it’s going in the direction that you want it to fly.
From that drop-down menu, like the other flight modes, you can choose your shooting interval (how often the drone takes a picture), the duration of the final hyperlapse (up to 30 seconds, which determines how many total photos you’ll end up with), and the speed that the drone will fly at along this course.
From here, after pressing “Start,” the drone will begin flying along the course in the direction you’re facing. So, you could be looking left, right, flying backwards, or have the gimbal pitched downwards or even upwards, and no matter what, the drone will fly along that course.
As a pro tip within “Course Lock,” you can also lock onto a subject. This will allow the drone to rotate to keep the said subject in frame while flying along your course.

This combines the same style of flying from the “Circle” hyperlapse mode and can make for some more unique hyperlapses. So, I make use of “Course Lock” way more than I do the “Circle” hyperlapse flight mode.
But still, I feel like it’s a little bit too one-dimensional like the drone is just flying straight, and that’s it. It’s nice that you can select the subject and then add a little bit of rotation in there, but again, it just flies along that straight line and does nothing else.
Waypoints hyperlapse mode
This next flight mode, though, “Waypoints,” is pretty much what I’ve been using to make most of my recent hyperlapses.
Just to give you an example of the dynamic flight that I’m able to achieve, these are some of the different hyperlapses that I’ve captured where the drone is moving in a lot of different directions at once.
The drone is changing heights, it’s pitching the camera, and in some of the hyperlapses, I’ve made the drone rotate too. There’s just a lot going on that makes it far more engaging.

Most of these hyperlapses also involve setting up only two waypoints, which is really easy and super fast to do. So, once you jump into the “Waypoint” hyperlapse, the first order of business is to set up our waypoints.
My workflow is basically to figure out where I want my hyperlapse to start and where I want it to end. So, I’ll add the starting point by pressing the plus icon on the first frame here, and then I’ll zip over to my endpoint and press on the second plus icon in my film strip.
These waypoints are added based on where my drone is hovering and where my camera is looking in real-time.
Now, if I wanted to get a little more creative and, say, dip down towards the art museum, I could add more waypoints to do so and further customize this flight.
But as you may have noticed from my example hyperlapses, I really enjoy letting the movement in the frame do all the work for me. My goal is to set up a simple flight path that shows off that motion.
Now, after setting up my two waypoints, I’ll fly as close as I can back to the starting waypoint, so the drone doesn’t have to do it for me.
If I were to just say press “Start,” it would fly really slowly back to that start point, thus draining more battery and giving me less time for my actual hyperlapse.
This is the one bad part about using waypoints: it takes a little bit longer to set up. You’ve got to actually manually fly to each individual spot instead of hovering in one place, selecting your subject, and then going.
So, you will drain more battery actually setting up your mission, therefore giving you less battery to actually capture your mission.
So, you just need to be efficient with your timing. Make sure you get your waypoints set, fly back to that first waypoint, and then get going as soon as possible.
Use sport mode to quickly get back to the start
Use sport mode if you can because you’re going to be able to get from point to point a lot faster, and therefore you can use more battery to actually capture your hyperlapse.
Now, once we’ve made it close to our first waypoint, we can begin tweaking our flight plan. This means that we can change the waypoint order.
Do we want the drone to start at the first waypoint and progress through, or do we want to fly backward from the last waypoint set to the first waypoint set?

We can also choose our interval. As I’ve mentioned, this is how often the drone will take a picture on its flight, and you can also decide the length of your hyperlapse or another way to look at it is how many total photos you’re left with.
The one thing you may have noticed is that there’s no way to change the speed of the drone because it’s actually determined by the other parameters.
So, for example, if you’re going to fly a waypoint hyperlapse mission between two waypoints and that distance is 2,000 feet, a 10-second long hyperlapse is going to make the drone fly faster than if, over that same distance, you’re going to create a 30-second hyperlapse.
So, the drone has to fly slower to take more pictures to then accommodate a longer hyperlapse.
Hopefully, that makes sense, but basically, your speed is determined based on the parameters that you set, such as your interval and the distance.
Once you have everything set, all that’s left to do is start your flight, and the drone will make its way to the first waypoint and go on from there.
Again, this flight mode is so dynamic. I love all the different options that I have and the different moves that I can make the drone do. Like, I don’t even have to fly horizontally.

In this hyperlapse here, for example, I just had the drone fly directly upwards and pitch the camera downwards to compensate for that movement, to make one of, if not probably, my favorite hyperlapse.
Task Library to save your waypoints mission
Now, to backtrack really quickly and go back to the planning section, the final thing I want to mention is the Task Library.
So, with the waypoints, you can save your mission to be replicated in the future. This will save everything from your drone’s position to the camera pitch to the interval and the length of your hyperlapse.
But just as a fair warning, each of these waypoints will not save the precise height of your drone at each waypoint. It’s the most bizarre thing, and it’s a very annoying bug. I’m not sure if DJI is ever going to fix it, but I want to make sure I throw it in here so that you’re aware of it.
For example, let’s say you set up a hyperlapse where one waypoint is at 200 feet and you fly to the next waypoint, and it’s at 300 feet.

The drone can sometimes fly to that first waypoint at 250, which means it’ll go to the next waypoint at 350, so it’s 50 feet off across the entire mission, which, to me, is unacceptable.
It’s completely unreliable, so I never fall back on using the Task Library. I always make sure that I fly the drone where I fly the mission within the same flight that I actually set those waypoints.
Waypoints, though, again, has become one of my favorite flight modes to use for capturing hyperlapses because you can achieve all the same movements as the other flight modes, except with more customization and precision.
Mission setup and best practices for hyperlapses
Okay, so now that our mission is set up, it’s time to go over a few tips and best practices to follow during the actual flight of the drone.
Because the flight is usually automated, I figured this would be a good time to share some tips and tricks from a shooting and flying standpoint to get the best hyperlapse possible.
So, something that is insanely important when it comes to capturing hyperlapses is composition, and it’s something, unfortunately, that you really can’t teach.
Like when it comes to photography, videography, and in this case, hyperlapses, teaching composition is nearly impossible. It’s something that, in my opinion, will just come over time as you create more, as you capture more, and as you continue to practice. As you continue to use and fly your drone.
You can take your knowledge from capturing photos and videos and apply them to create these hyperlapses. However, there are a couple of things that I keep in the back of my mind when creating hyperlapses that are really important specifically for capturing this version of a moving image.

What is your hyperlapse subject?
For example, your subject is so important; make sure that you can easily see it. But your subject might be something that’s not usual. For instance, in the video, I did of Sedona. While I had those beautiful mountains in the background, they weren’t my subject – the clouds were the subject. I wanted to make sure that you could see the clouds in most of my frame.
So, if I were capturing an interstate, for example, I’d want to make sure that the movement is seen throughout the image and not just in the bottom corner.
Showing that movement throughout the frame is so important. I’m going to sound like a broken record, but composition overall is so, so important, and it’s something that really is just going to take practice and time.
Now, moving on to the topic of something a little bit more annoying: just know that if your drone becomes disconnected, it will immediately stop your hyperlapse and begin returning to home.

As you can imagine, this is extremely annoying because if you’re in the middle of a hyperlapse and the drone comes back to you, there’s no way to just pick up where you left off.
You’ve got to completely restart your hyperlapse, and think about it – you’ve wasted all that battery. You’ve got to then come back, land your drone, put in a new battery, put in a fresh battery, take off, and then restart.
Hyperlapses require fully charged batteries
That brings us to our next tip, which is probably pretty self-explanatory and something I don’t need to mention, but make sure you have fully charged batteries when you start your hyperlapse.
Because if you want to capture 750 photos, you can’t do it on 70, or maybe even 80 percent battery – you need a full 100 percent to capture those photos and then make it back.
Best DJI drones to capture hyperlapses: DJI Mavic 3 and DJI Mini 3 Pro
Now, you might be wondering what the best drone is to capture a hyperlapse with, and the answer is these two right here: the DJI Mavic 3 Cine and the Mini 3 Pro.
Now remember, any of the recent drones that have come shipped after the DJI Mavic 2 Pro that have optical zoom sensors on them will have the hyperlapse feature built in and will still give you good results.

But these two here are the best, in my opinion, because their flight time is crazy long – like over 40 minutes of flight time out of one battery. This is enough to fully set up a waypoint flight mode and then execute that flight all on one battery.
Each of these drones has its own benefits as well. For example, the DJI Mavic 3 Cine version can capture hyperlapses at a one-second interval compared to all the other drones that have a minimum of two seconds.
This allows you to capture photos faster for a different feel to your hyperlapse. Even though all the other Mavic 3 drones have the hardware capable of doing this, it’s worth considering the options.
I think that DJI wanted to give the more expensive version an upgrade, so to speak.
The DJI Mini 3 Pro, on the other hand, has a camera that rotates vertically to capture vertical hyperlapses natively.
As I mentioned, I share a lot of these hyperlapses through Instagram, which is a platform that caters to vertical videos. So, if I can natively shoot in that aspect ratio, it makes my workflow a lot more streamlined.
I still do a lot of vertical hyperlapses with my DJI Mavic 3 which doesn’t have a camera that rotates vertically, but we’ll get more into that when I get into the editing portion of this video.

Smooth drone flights make better hyperlapses
The final tip that I want to share with you is just to be vigilant for any sort of erratic flight from the drone while it’s mid-flight. For example, I’ve seen the drone sometimes shake around a lot just because of heavy winds.
Sometimes I’ve seen the drone completely lose its subject and start to rotate a little bit too fast. Sometimes I’ve even seen the drone fly faster than I programmed it to. So, I might say that I want the drone to fly at 0.7 miles an hour, and then it speeds up and flies at 7 miles an hour, right?

So if you can be vigilant about that and make sure that you can stop it midway, you might be able to restart your hyperlapse and finish on that same battery, or you can at least not waste time and get left with a hyperlapse that you’re not going to use because the drone messed up.
To give you an example, I have this really epic hyperlapse I captured, and I got so lucky – there were five total trains that passed through, clouds moving, traffic zipping along I-76, and don’t you know that the wind completely threw the drone around, making it nearly impossible to stabilize.
That’s just how it goes, though. Sometimes these hyperlapses just don’t turn out the way that you intended and are completely unusable. That’s why I like to try different angles multiple times and thoroughly analyze the finished product right there within my remote after capturing.
If it’s unstable or if it makes any weird movements, I can simply redo it while I’m there instead of being frustrated when I get back with an unusable hyperlapse.
File management and editing your hyperlapse
Okay, so now that we’ve planned our mission, we’ve flown the drone, we’ve captured all the photos, it’s now time to move on to the second portion of the video, which is file management and editing.
And think about that – everything that we’ve already done: we’ve driven to the location, we’ve planned our mission, we’ve scoped everything out, we’ve captured the hyperlapse, we’ve taken all of our photos, we’ve driven back home, and we’re now just at the halfway mark.
There’s still so much more to do to get this hyperlapse looking the way we want it for our end result. I told you there are going to be a lot of steps here, but we’re going to put on our editing hats and jump on the computer to move on through.
So, the first step is to get our files off of the micro-SD card from the drone. If you remember to capture RAW photos, you should be left with a full batch of images to pull off your card, as well as the version of the video that the drone created for you.
In my case, with this test hyperlapse, I’ve got a total of 750 RAW images and one video file, so 751 total files.

The way I like to structure my files and folders is to start with the shoot date and then add the location. So, in this case, it’ll be March 28th, 2023 – Gettysburg.
I label my date with the year first, then month, and then day so that within my shooting archives in my Finder on my Mac, the folders are all in order of the date that I was out capturing those images.
Within this folder, I’ll then make a subfolder with the name of the drone that I used, so in this case, it’ll be the DJI Mavic 3 Cine.
From here, I’ll copy over all the files from the onboard SSD, which in this case, is a total of about 26.5 gigabytes. Doing a lot of hyperlapses will definitely eat up a lot of storage, especially if you’re a crazy person like me who enjoys saving every single RAW file that I have ever taken ever.
Now, the next step once we’ve moved all of the photos over onto the hard drive of our computer or over onto an external SSD is to edit those photos.
So, personally, I use Lightroom, the cloud version of Lightroom. You might use something different; you might use Lightroom Classic or any other photo editor.
But really, the one thing you need to make sure it’s able to do is batch edit photos so you can edit, say, one photo and then copy those settings and paste them throughout the rest because we’re going to be dealing with a lot of images here.
After I bring all of my photos into Lightroom and categorize my folder with the same naming scheme I use with my folder in Mac Finder, I edit the first photograph to my liking.
I adjust everything from the exposure to the white balance to the color. I adjust the texture, clarity, and dehaze as necessary. Basically, I’m implementing my workflow for editing a photo as if I just captured this one single frame.
From here, after I have the photo in a place that I like, I’ll copy the edits from that photo and paste them amongst the other 749 photos within this album, so all the other photos that are going to make up the hyperlapse.
This copy-and-paste process can take a little while to complete, so at this stage, I’ll usually step away from my computer to get something else done or I’ll kill some time by trying to find another task to complete while here on my computer.
RAW photos make for the best hyperlapses
This right here is the reason why we capture RAW photographs. This is the biggest piece of the puzzle, and it’s the reason why we deal with a library of 26.5 gigs of photographs just for one hyperlapse.
Because you get so much more flexibility out of these RAW photographs when you edit them: better dynamic range, better control over the white balance, better control over the colors, just better editing in general that’s going to make your hyperlapse look that much better.
Now, once the edits have been applied to all the other photographs, I quickly rip through to make sure that all the photos look good with those settings applied.
Sometimes cloud cover can mess things up, changing light, maybe a different subject comes in a frame; there are a lot of things I am specifically looking out for, but really I’m just doing a high-level scan to make sure that they all look good.
Sometimes this process is lengthened by finding one little thing that I want to change, and then I have to copy and paste those edits to all the photos again, but that’s just how it goes with photo editing. I can never be satisfied for some reason.
Batch export the images as JPEGs
Now, once you have all these photos to a spot where you like the look of them, we’ll batch export the images back onto our hard drive as full-sized JPEGs.
You don’t want to do any sort of resizing to mess with the resolution because we’ll be cropping these down slightly when we turn them into a video, so we want as much resolution to play with as possible. Within my main folder, that is titled with the date and location, I’ll make a subfolder titled “Hyperlapse Edits” and store all the edited JPEGs right in there.
This is another process that can take some time when dealing with these large batches of photos, so it’s always good to just step away rather than wait for the progress bar to slowly tick along.
So, capturing all of those RAW photographs really does make a huge difference. You wouldn’t be able to get the same look if you captured all JPEG photographs.
And think about it, right? You get all these still RAW photographs; you could pull some out and just use them as stills, and you could print them, post them, or do anything you want to them.
So, you’re really getting the best of both worlds here; you’re getting a bunch of still images and you also get a moving video in the form of a hyperlapse.
Video editing to create your hyperlapse
Okay, now moving into the video editing portion, it’s time to finally turn all these photos into a moving video, into a hyperlapse.

And right off the bat, I just want to say that my process, my workflow moving on from here, is not the best. I mean, I’ve tried different things to make it a little bit more seamless, but I jump around to different programs.
I use different software, so just follow along with me. You’ll end up getting it eventually. It’s something that now just works in my brain. I zip all around my computer and make that final hyperlapse happen as I need to.
But just know that this is an area that, personally, I’m trying to focus on fixing and making better. If you have any implementations in your workflow that you want to share, definitely put them down below in the comments section.
I really do urge this to be like a community thing, so people can share their feedback and let me know what you do in this process, in the video editing process for creating a hyperlapse.
Final Cut Pro for editing your hyperlapse
So, the first thing I do is jump into Final Cut Pro and create a new library for every single shoot. I make a new library, and then typically each project within that shoot will get its own event. So, I’ll just name this event “Hyperlapse.”
We’ll go ahead and drag all the edited photos into our event and create our first project to loosely assemble our hyperlapse.
The project I usually title “Hyperlapse-Full,” and the resolution is the full size of the photograph. So, in this case, on my Mavic 3, it’ll be 5272 by 3948.
Now, once we drag in all of those photos to the timeline, the video will be insanely long. So, we’ll select all the clips by dragging across, right-clicking, and then selecting “Compound.”
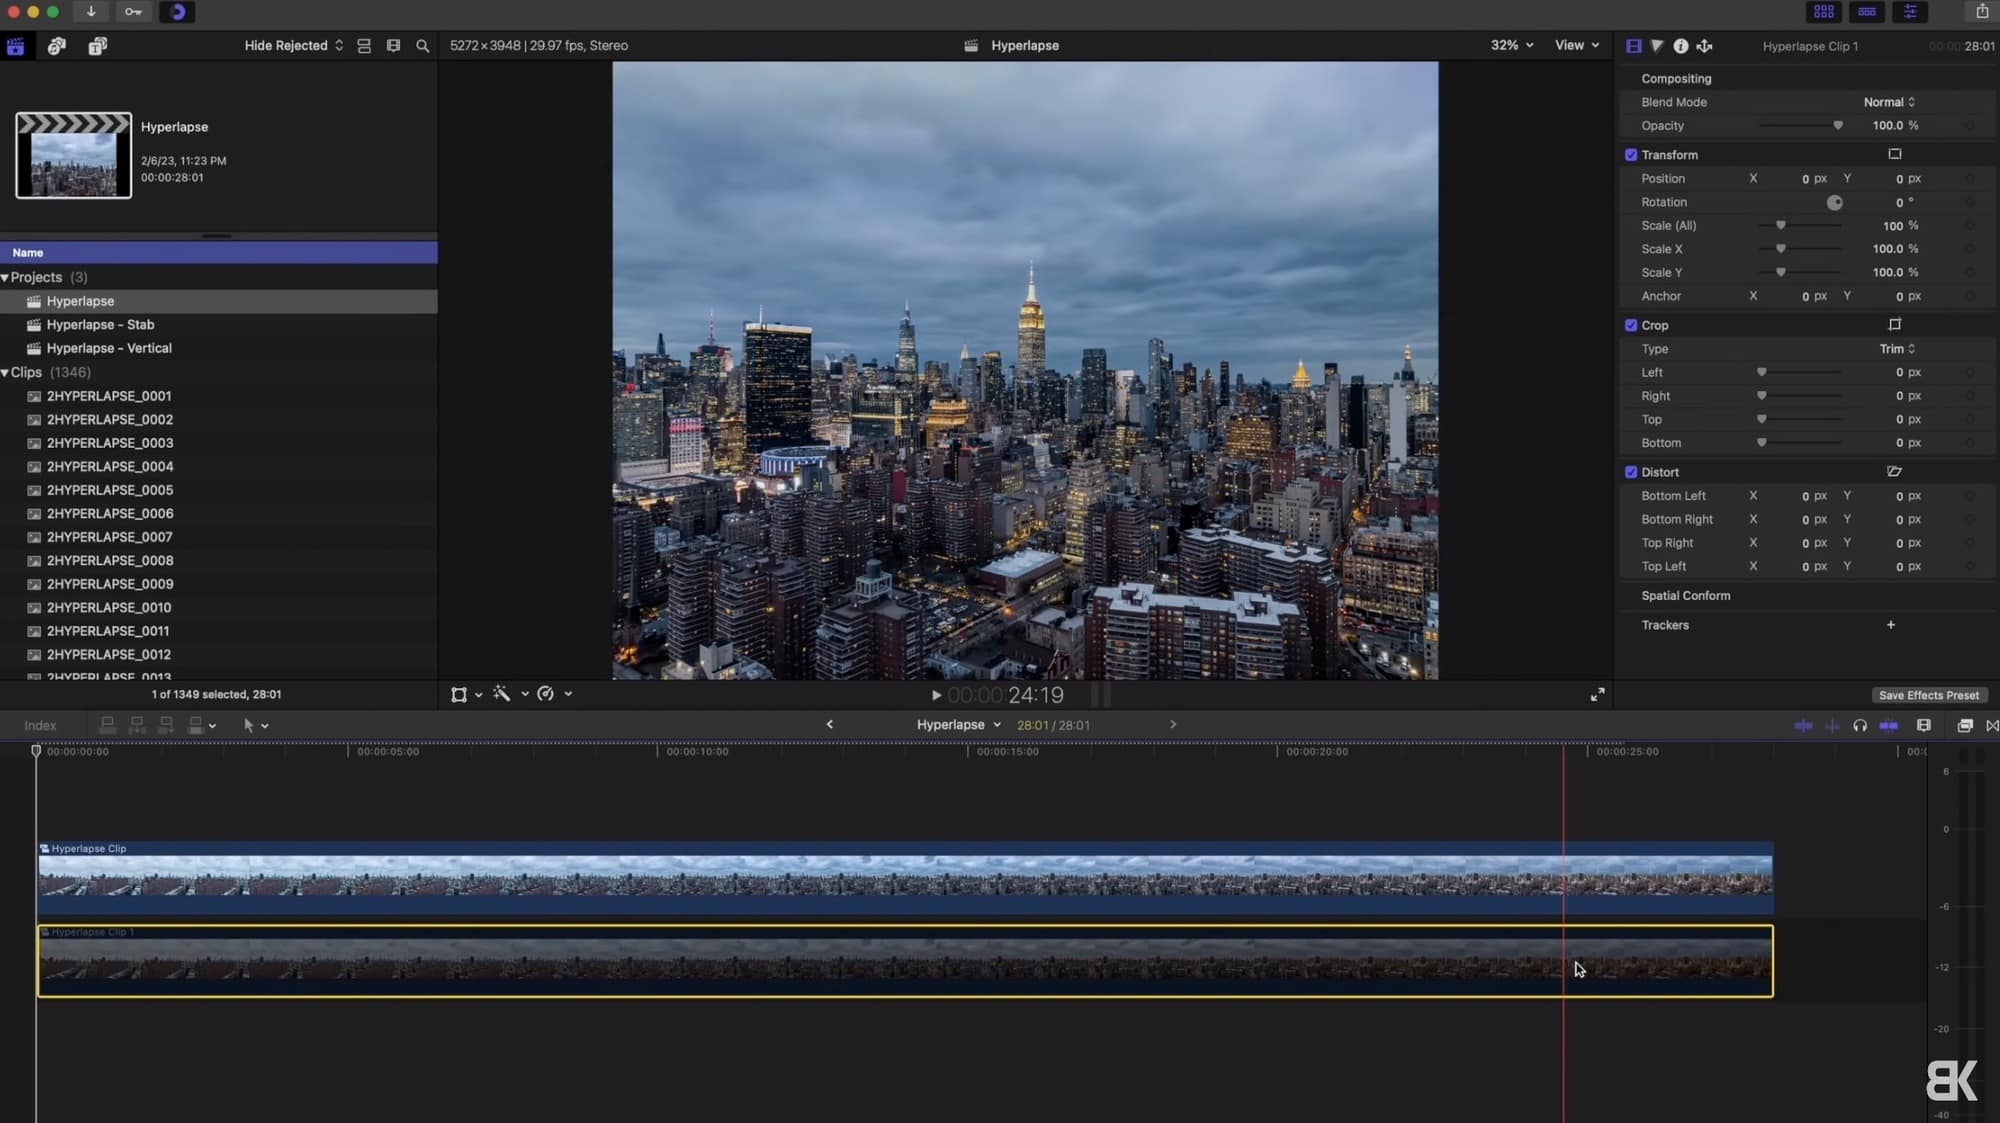
This gives us one single video clip to deal with, to make things a whole lot easier. Now it’s time to shorten this, so I’ll press Command+R to bring up the retime controls for this clip, and then I’ll speed it up to match the length that I selected in the DJI Fly app.
So, in this case here, I took a full 30-second hyperlapse with 750 photos, so I’ll retime this to be 30 seconds. If instead, you did half, so 375 photos, then you should go with the length that you selected in the Fly app, say, 15 seconds.
Add stabilization for a smooth hyperlapse
Now, when you watch this initial video back, this initial compounded clip, it will look insanely jumpy. So, we need to add stabilization to this. Unfortunately, Final Cut Pro doesn’t allow you to stabilize a compound clip, so we have to export this project and then import that compounded clip to trick the software into thinking it’s an actual video file.
This is the reason I made the project the full resolution of the photo, so that we wouldn’t lose any resolution in the video when we export it.
Now, once I’ve imported that clip, I’ll create a second project called “Hyperlapse-Stab1,” with “Stab” standing for stabilization.
The resolution of this project will be the full resolution of the photo again, so 5272 by 3948 on my Mavic 3.
The reason I put “1” at the end of the name is because I know that in most cases, I’ll have to run multiple layers of stabilization to get a super smooth end result. Like with this clip, when I add Warp Stabilizer and play with the different algorithms, SmoothCam and InertiaCam, it takes out a lot of the initial shake, but it isn’t as smooth as I’d like it to be.
From here, I’ll repeat the process again: I’ll export this video file, re-import the stabilized clip, and then add it to a second project called “Hyperlapse-Stab2,” again with the full resolution of the photo, so 5272 by 3948.
Adding the second layer of stabilization did the trick for me to smooth out the final little bumps, which means I can re-export my video file to make our final video project.
This gets titled “Hyperlapse-Final,” and because I typically share my hyperlapses as an Instagram reel, I want to export this in a 9×16 aspect ratio, and I like to make it 4K, so 2160 by 3840.
Because we’ve been exporting our files in the higher resolution, we’ll have plenty of pixels to play with here when cropping down on our image.
So once I’ve increased the scale of my video and re-centered it to put my main subject right there in the middle, all of the hard work is pretty much finished.
I just need to do something to make this video loop. So typically, I just duplicate the clip, reverse it, and then from here, it’ll continue to bounce back and forth on Instagram.
Conclusion and bonus tips
Okay, so that is my full process from start to finish on how to create a hyperlapse, from the planning to the capturing of the file management, to the photo editing, to the video editing.
That is each and every single step that I take to create the hyperlapses that you see over on my Twitter and Instagram.
But I do have some bonus tips, kind of like some pro tips, I guess, I want to share with you. So let’s first start with a couple of editing tips that fall into this bonus category.
Adobe After Effects and the Stabilized Motion tool
The first is the use of Adobe After Effects and the Stabilized Motion tool that can be used if your clip just really won’t get stable, no matter how much Warp Stabilizer you use. I don’t need to use this every time, but it is a great way to take out any minor jumps or bumps in your video.
I typically just bring one of the already stabilized clips that I made from Final Cut Pro and then run that Stabilized Motion tool.
Final Cut Pro is still my final point of editing, though, so I’ll use it to resize my horizontal video clip into a vertical video clip for uploading to social media.
Balance the light in your hyperlapse
Editing Pro tip: Here is a trick that I use during sunset hyperlapses where the lighting changes. Remember how we’d copy and paste our photo edits across the entire collection of photos?
Well, if your first photo was taken when the sun was up and shining, and your last photo was taken in the dark after the sun has set, then your edits are not going to look the same because the light is drastically different.
You’ll have to edit each photo differently. So, how do you compensate for light that gradually changes? I mean, you could go through and edit each individual photo, but that would be a huge pain and probably would honestly look pretty terrible.
So, the trick that I’ve used is to edit my first photo, paste the settings throughout, and then export that first batch of photos.
Then I’ll re-edit the last photo and paste those settings throughout, giving me two total sets of photographs – one edited for the first photo and then one edited for the last photo. Fast forwarding to the video editing process:
In my first compound clip that I named “full,” I’ll layer each set of photographs on top of each other. The clip that is filled with photos edited for the first photograph will be keyframed to go from 100% opacity at the first frame to 0% opacity on the last frame.
I then flip this for the clip that is filled with photos edited for the last photo. That’ll be keyframed to go from 0% opacity to 100% opacity.
This will give us an end result that looks perfectly natural. The change in light is perfectly accounted for by merging both of these sets of photos together.
I’ve heard of some people using a plugin called LR Timelapse (Lightroom Timelapse). Personally, I haven’t tried it; I found this method to work fine for the hyperlapses that I like to capture, which is those kinds of day-to-night hyperlapses where it starts with the sun up, the sun sets, and then all the lights in, say, a city skyline turn on.
Keyframe your hyperlapses
Now, on the topic of keyframing, the final Pro Tip within the editing section that I want to share is that you should keyframe your hyperlapse, especially when sharing vertically so that the subject is in the center of your frame.
After running all of the stabilization and with the drone potentially drifting from your selected subject, this will help you keep things centered.
Get creative with your hyperlapses
Now, the final thing I want to leave with you here, this final section, is just to be creative. Right? Try to find ways that you can make your hyperlapses unique.
One thing that I like to do to get a little creative is to use an ND filter on the front of my drone when flying during the day.
So, I try to get my shutter speed to about half a second or a full second because then, with all that motion in the frame, it’s going to be even more exaggerated with motion blur instead of the stop-motion look you get when you crank your shutter up.
So, there are plenty of ways to get creative. Use waypoints to change your flight path, or maybe use different editing techniques. There are so many ways to get creative. Really, at the end of the day, this is my workflow, and this is how I do things, but you can take my workflow and make it your own to get your own unique style.
Anyway, thank you guys so much for watching. I know that we covered a lot. If you’ve got any questions, feel free to let me know in the comments, and I’ll try to get back to you.
But again, I want to make this a community thing. So, if anybody has any other information about how to better create hyperlapses, or if you want to share anything, please leave it down in the comments below.
Anyway, thank you guys so much for watching, and as always, I’ll talk to you later. Peace!
Discover more from DroneXL.co
Subscribe to get the latest posts sent to your email.
Check out our Classic Line of T-Shirts, Polos, Hoodies and more in our new store today!

MAKE YOUR VOICE HEARD
Proposed legislation threatens your ability to use drones for fun, work, and safety. The Drone Advocacy Alliance is fighting to ensure your voice is heard in these critical policy discussions.Join us and tell your elected officials to protect your right to fly.
Get your Part 107 Certificate
Pass the Part 107 test and take to the skies with the Pilot Institute. We have helped thousands of people become airplane and commercial drone pilots. Our courses are designed by industry experts to help you pass FAA tests and achieve your dreams.

Copyright © DroneXL.co 2026. All rights reserved. The content, images, and intellectual property on this website are protected by copyright law. Reproduction or distribution of any material without prior written permission from DroneXL.co is strictly prohibited. For permissions and inquiries, please contact us first. DroneXL.co is a proud partner of the Drone Advocacy Alliance. Be sure to check out DroneXL's sister site, EVXL.co, for all the latest news on electric vehicles.
FTC: DroneXL.co is an Amazon Associate and uses affiliate links that can generate income from qualifying purchases. We do not sell, share, rent out, or spam your email.


