LightCut – DJI’s Officially Recommended Video Editor

Check out the Best Deals on Amazon for DJI Drones today!
Good day, folks! Shawn here from Air Photography. In today’s video, we’re going to be taking a look at some free video editing software from DJI called LightCut.
Now, this editing software is unique because it is DJI’s officially recommended software. If you go to the DJI website under downloads, you can see they have it listed there, and they even have a page that goes over all the details and features of this app and why it’s an excellent choice to use with DJI products.
The main reason is that you can connect to your DJI devices. As you can see here, I already have a few devices listed that I’ve already been connected to, and as you can see at the bottom, it’s continuing to search for new devices that I power on.
Real-time editing with LightCut
The premise behind this is that it allows you to connect to the drone, scan the memory card, and preview all your footage in real-time. From there, you can edit it. Basically, you’re editing off the drone; you don’t have to copy all the files over, wasting space on your device. We will take a closer look at that here, coming up in a minute.
Software like this might be of interest to people who are just getting into drone flying. They want some simple software that works well, is flexible, easy to use, and more importantly, free. If you’re just a hobbyist, you don’t want to invest a lot of money into video editing software.
More importantly, a lot of people don’t want to invest the time to learn something complex like Adobe Premiere or Final Cut, especially if you’re just editing little clips to share on social media.

Perhaps you’re trying to grow a YouTube Shorts channel, Instagram Reel channel, or even TikTok. Something like this is a great choice for those scenarios.
Editing-made simple with LightCut
Now, I am going to do a screen recording just so you can see a little bit better what I’m doing. Basically, this is the LightCut app interface when you launch it. It’s very simple and gives us a couple of options down here at the bottom.
You can see we have “Create” and “Templates.” For the most part, in this video, I’m going to stick to the “Create” section. Templates are basically just what they sound like: they are template-driven.
You can select a theme you like, select some clips, and it’s going to auto-generate a video for you. Now, you can do this auto-generating in the “Create” tab as well; I like it better just because it’s a little bit more flexible.
From this main interface, you can see we have three options: “One Tap Edit,” “Inspire Cam,” and “New Project.”
If we were to select “New Project,” that’s basically like traditional timeline editing. It’s fully manual; you can go in, add clips, cut them, color grade them a little bit, add music – everything is in there. You’re basically doing everything manually, and we will take a look at that in a second.
Above that, we have “Inspire Cam,” and that is storyboard editing. We’ve seen this before in other apps. Basically, it gives you a storyboard, tells you how long to shoot for, and what style of shots to get, and then it will put it together in a little edit for you.
One Tap Editing with DJI LightCut

The one that a lot of people will be interested in is “One Tap Editing.” This is the quickest and simplest way to use the DJI LightCut app. It’s fully AI, so when you select your clips, it’s going to try and find the best moments. It will determine whether they’re ground shots, aerial shots, whether you’re cycling, at a party, with people, or at the beach, etc. It’ll then choose an appropriate template with the appropriate music, something that fits with the kind of content you’re adding. But of course, it’s fully customizable, and we can change things as we go.
So let’s go in there, and what we’re going to do is start selecting some clips here. Now, the reason why I like using the one-tap edit over the other template feature is that we can go into each individual clip and select some highlight spots.
That way, the LightCut knows where the really good spots are, things that we want to use. Although the AI is pretty good, it doesn’t always get it right, and if we have a three-minute video, there might be two or three different spots in there that are really good that we want to use in the edit. By adding highlights, we know that the software is going to make use of those spots.
So let’s go ahead here, and we’re going to add our first video. We’ve selected it, it’s labeled number one, and you can see it’s added it to the bottom there. But if we go back to that video, you can see we have this little expanding arrow. So we can click on that, and we can play the video here. And what we can do is we can add some different highlight spots.

You can see maybe we like that spot there; we can fast-forward it. You can see here’s another section with the train moving sideways; we can add another spot. So we’ve added two sections that we know we like and want to include in the edit.
We can also then select that spot, and we can make it a little bit longer by dragging those handles, or we can shorten it up or change the position altogether.
At the bottom here, it’s telling us that we have two highlights selected. If we don’t like one of them, say we added one accidentally, we can just click that ‘X’, and that’s going to delete it.
So then we can go back to the main page, and we can go to the next video, and again, we can go in and select our highlight spots. We can fast-forward it again and select another there.
We would just repeat that for all the different shots. Now, I’m just using clips that I have stored on my phone right now, but this would work pretty well the same way if you have it connected directly to the drone, and again, like I said, we will take a look at that here coming up in a minute.
Now, at this point, just go through and collect everything that you want to add. We hit next, and at this point, it’s going to analyze the files.
So, what it did there is it analyzed all the footage, tried to find anything that was interesting. It also made use of the highlights that we added. It added cuts and transitions in the appropriate spots to go with the music, so everything was done automatically with AI. So, we can give it a quick preview to see what it came up with.
So, as you can see there, it did not do too bad of a job. Now, I do highly recommend if you’re going to use this auto-editing feature to go in and add a few highlights in spots that you know look good because sometimes the AI doesn’t always get it right.
Now, at this point, if you don’t like the theme that’s chosen, we can go in and manually change that. As you can see at the top here, we have all different themes you can select: aerial, nature, and cheerful. And every time you select one, it’s going to change the theme and change the music.
You can go in and preview and decide which you like best. Once you’ve picked a theme that you like and that you’re happy with, we can go in and adjust things a little bit to customize it to our own taste.
The first thing we can do is add filters. Now, when we go into filters, you can see that we do have three different options: filter, adjust, and aqua.
Filter basically just adds some pre-made filters trying to mimic different looks.

Adjust basically allows us to go in and do our own grading. You can see it lists all the clips. We can go in and adjust the saturation, contrast, and brightness. We can apply it just to that specific clip or we can apply it to all of them. So, if we make an adjustment, say to the contrast, and we hit apply all, every clip is going to have that same change. It’s kind of limited to the kind of grading you can do, but for the most part, for simple edits, it’s enough to get the job done.
Now, at the very right-hand side here, we have Aqua. So, that’s basically filters to help you get the best footage for content that was shot underwater. Say you film some underwater footage with your DJI Osmo Action, you can go in and apply some filters to help make it look a little bit better.
We can also add text and stickers, so we can do that in that section. But we do have an edit section here. This allows us to go in and make some changes to some of the cuts and different things that the AI has done.
For example, if we take a look at this first clip here, we have the first clip highlighted. We can go to extract, and you can see here we have the whole video clip, and that’s the section that it’s using.
We can actually drag it along, so say we want it to start there instead. Maybe we found it was starting a little too early from a spot that we liked. We could just adjust it and then hit the checkmark to confirm.
At the same time, we can also adjust the speed. So if we want to speed the footage up or slow it down, we can do that in that same area. Or, we can completely replace the clip. Say we don’t like that clip and want something different; we just select replace and then select an appropriate clip.
If you go back, we can also crop the video. So, say we want to squeeze in a little bit to give it a zoomed look, we can do that. And we can also rotate it if that’s what we need to do.
We can set the volume of the clips, delete clips, and change the sort order. So if we like some of these clips, but we just want to move them, we can easily adjust things. It’s very easy to customize it and get things looking the way you want.
Export your drone video with DJI LightCut
Now, when you’re done and you’re happy and ready to export your video, at the top here, we have our export tools. First of all, you can see we can select our resolution. We can export it as a 720, 1080, or 4K video file. We can set our frame rate from 30 all the way up to 60, and it gives us an approximate size of the video file.
We can also change our aspect ratio. All these clips were filmed in a landscape format. You might be editing shots from the DJI Mini 3 in portrait, so you may need to change the aspect ratio, especially if you’re going to be uploading to YouTube shorts or something like TikTok.
You can see there I’ve changed it to a 9×16, and it adjusted everything accordingly. When you’re ready, you just hit export, and it’s going to save it to your photo library. So that was using the one-tap edit, basically using AI to help you along.

Now, if you want to do everything manually, you want to do your own cutting and clipping, and you want to do a little bit of speed ramping, there are some tools built in there to allow you to do that. For that aspect, what we’re going to do is select a new project, and here again, we can select any clips we want to bring in.
I’m just going to start by bringing in one clip. As you can see, we basically have just a regular timeline. We can stretch it in; we can shrink it down. And just like any traditional editor, we can go in and split our clips, as you can see there.
We can then delete sections, and if we click in between the clips, we can actually set different transitions. You see, they have a nice glitch one there if you like
And here again, we can select any clips we want to bring in. I’m just going to start by bringing in one clip, and as you can see, we basically have just a regular timeline. We can stretch it and shrink it down, and just like any traditional editor, we can go in and split our clips, as you can see there.
We can then delete sections, and if we click in between the clips, we can actually set different transitions. You see, they have a nice glitch one there if you like that, and it will give you a bit of a preview of what it’s going to look like. They have some roll transitions, and you can set the length of the transition and how long it takes.
Then, back in the main editing tab, we can also reverse a clip if you want to reverse it. Now, at any time, we can add a new clip by hitting that plus sign at the side. We can hit “add,” and that’s going to add that full video clip again, which we can go in and edit.
Now, I’m going to delete that because the other thing we can do here is, click that plus sign again to add a clip, but this time, let’s use those arrow markers as we did earlier. We can actually select certain clips just like we did before. We can select the length, and we can add as many as we want.
Then, when we go back and hit “add,” you can see it’s now added all those little highlight markers that we added. Everything is already cut for us. We can zoom in just to make it a little bit easier to see. We can add transitions and do any editing and adjusting that we need.
Now, one thing I do want to show you here that’s really interesting is, if we select one of the clips, we can go over to the speed tool, and this is where we can speed up the footage or slow it down if we want some slow motion.

But we also have a curve tool, which kind of mimics speed ramping if you want to get some speed ramping effects. You can see we’ve got our linear line here, so if we want the video to play in real-time at the start but then we want it to ramp up and go at a faster speed, you can see we can do that. We can then slow it down, you know, so we can do all different things.
The closer you have these markers together, the quicker the transition from slow to fast will be. And on top of that, they actually have some custom ones that they’ve pre-built with different effects.
So, if we click on that, you can see it gives us some options. We have “montage,” “hero movement,” “bullet time,” you know, so it kind of gives you some different interesting effects. So that’s something you can play around with and see what you like.
Now, back at the main editing page, if we look at the bottom, there are other things we can do again. We can add some titling, we can go in and adjust, do some color grading, and we can add music if we click here to add music.
So, you can see here we’ve got all different types of music that we can use. We can go in and preview it, and see what we like. And one interesting thing that they’ve done here is they have this thing called “rhythm,” and what we can do is we can play the music, and we can add different rhythm marks.
The reason why you would do that, as you can see here at the bottom, is it’s added these little dots that make it easier when we’re going to do our editing; we know where we want

And the reason why you would do that, as you can see here at the bottom, is that it’s added these little dots that make it easier when we’re going to do our editing. We know where we want our cuts.
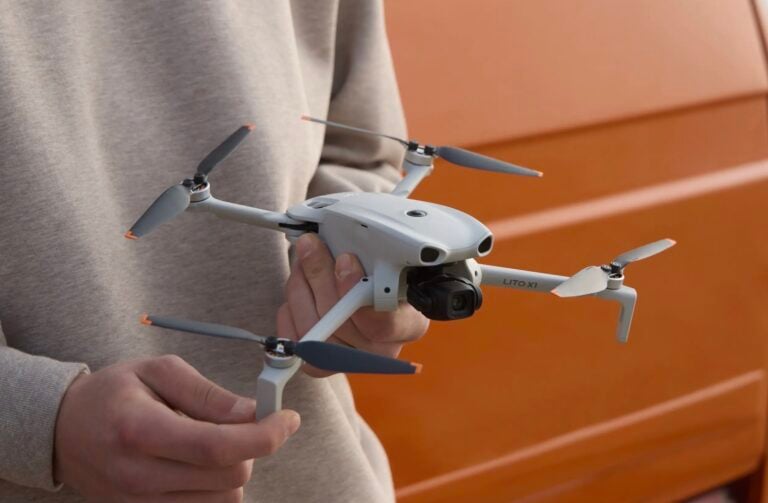
Now, before I go, I’m just going to do a quick demonstration on how you can connect directly to something like your drone. According to the DJI website, this is compatible with the DJI Mavic 3 Series, the DJI Mini 3 Series, the Action 3, the Action 2, the Pocket 2, and of course, most of the Osmo Mobile products.
Now, of course, you can edit from any other device, something like the DJI Mini 2 or any other camera. You just won’t be able to connect directly to the device like I’m showing you here; you would have to transfer the footage over to your phone first.
LightCut on iOS: turn off cellular
Now, like a lot of DJI products with iOS, there’s a little bit of a bug that you do have to turn off the cellular connection. We’ve seen that with some of the Osmo products and using quick transfer; sometimes, you have to disable that. So you just want to go in and make sure that you have cellular turned off.
Then, what we do is click on “device.” You can see right away it’s now asking me to connect to the Mini 3. Now, I’ve already been connected to it in the past, so it should just connect automatically. The first time you connect a device, it’s going to ask you to press the power button just to confirm the connection, but I will go ahead and hit “connect.”
It’s going to ask us to join the network, so as you can see here, it’s now listing all the content that’s on the memory card. Basically, this is reading the memory card of the DJI Mini 3 Pro, and like I demonstrated before, we can go in and select whatever clips we want. We can go in and add highlight markers, click “next,” and again, it’s going to analyze the footage just like before.
But the difference here is that it’s just reading it off the memory card; it’s not actually copying those high-res files over. Now that’s important because we know a lot of times, these smartphones have limited storage, so we don’t want to waste space by bringing all these large files over.
And just like before, when it’s done, it’s made a little auto-edit. Again, we can go in and adjust the template or we can go in and do some manual adjustments ourselves.
When ready, we can now export, and as I said, the really interesting thing here is we’re just going to have one 4K file when we’re done.
We did not need to copy anything over from the drone. Basically, we’re using the drone like a mobile hard drive; it’s going to be editing right off the drone.
If you go to our camera album now, there’s our dog. If we go to our camera album now, there’s the video file that I just exported. Now, that wasn’t anything spectacular because I just did that quickly.
So you can see the value in that if you’re on vacation and you just want to make a couple of quick edits. You don’t have to transfer any content over; you can just connect directly to your device, whether it be the Action 3, the Action 2, your DJI Mavic 3, the DJI Mini 3, and you’ve got a nice 4K video file without having to waste a lot of space on your phone.
Well, folks, that’s basically it—just a quick look at DJI LightCut, something that some of you may be interested in.
Now, one thing I do want to mention here before I go is that if you want to edit on an iPad, you can download LightCut for an iPad, but it’s going to run in an emulated mode for a phone. There’s no native iPad app yet; that may change in the future, but right now, it’s really designed for smartphones.
Hopefully, you enjoyed this video and got some value out of it. Give it a thumbs up if you did; it’s always greatly appreciated.
Don’t forget to subscribe to my channel, so you don’t miss any of our upcoming videos, and we’ll see you in the next one. Thank you.
Let us know in the comments below what you think about the free DJI LightCut editing app. We are curious to hear your thoughts.
Discover more from DroneXL.co
Subscribe to get the latest posts sent to your email.
Check out our Classic Line of T-Shirts, Polos, Hoodies and more in our new store today!

MAKE YOUR VOICE HEARD
Proposed legislation threatens your ability to use drones for fun, work, and safety. The Drone Advocacy Alliance is fighting to ensure your voice is heard in these critical policy discussions.Join us and tell your elected officials to protect your right to fly.
Get your Part 107 Certificate
Pass the Part 107 test and take to the skies with the Pilot Institute. We have helped thousands of people become airplane and commercial drone pilots. Our courses are designed by industry experts to help you pass FAA tests and achieve your dreams.

Copyright © DroneXL.co 2026. All rights reserved. The content, images, and intellectual property on this website are protected by copyright law. Reproduction or distribution of any material without prior written permission from DroneXL.co is strictly prohibited. For permissions and inquiries, please contact us first. DroneXL.co is a proud partner of the Drone Advocacy Alliance. Be sure to check out DroneXL's sister site, EVXL.co, for all the latest news on electric vehicles.
FTC: DroneXL.co is an Amazon Associate and uses affiliate links that can generate income from qualifying purchases. We do not sell, share, rent out, or spam your email.


