DJI Mavic 3 drone review: torn between two opinions

Check out the Best Deals on Amazon for DJI Drones today!
DJI introduced the Mavic 3 in early November 2021, with a lot of marketing fanfare. According to DJI, the long-awaited successor to the Mavic 2 boasts a dual-camera system and has been upgraded on several fronts. But how is the Mavic 3 in daily use? Is the Mavic 3 the perfect successor for the Mavic 2 Pro and Zoom? Is it possible that the Inspire 2 has already been phased out? I purchased the DJI Mavic 3 Fly More Combo and began working with it to make this DJI Mavic 3 drone review.
DJI Mavic 3 drone review: torn between two opinions
Let me start by clarifying something. DJI did not provide me with a review sample of the Mavic 3. That meant I had to purchase it myself. Given the significant price difference between the standard Mavic 3 ($2,199 DJI / Amazon) and the Mavic 3 Cine ($4,999 DJI / Amazon), I waited a bit. I ultimately chose the Mavic 3 Fly More Combo ($2,999 DJI / Amazon) since I seldom need to submit aerial footage in ProRes to my customers and my laptop is quick enough to process images with H.265 compression.
In any event, I was intending to buy the Mavic 3 to add to my drone fleet, which now includes a Mavic 2 Pro and an Inspire 2. My Mavic 2 Pro needs to be replaced after more than three years of intense usage, and the Inspire 2 has a lot of practical problems due to its size and weight that prohibit me from using it often. So I was hoping that the Mavic 3 will not only replace my Mavic 2 but also partially replace my Inspire 2.
Unfortunately, DJI has not yet made all of the Mavic 3’s features accessible. As a result, options like panoramic photography and ActiveTrack will not be covered in this review. Another feature that you will lose if you purchase the Mavic 3 today is the so-called Cx label. Now, DJI can’t do much about it since the technological standards that the EU will impose on drones in the future haven’t been fully determined yet. You can find out what this implies at the end of this review.
Design and visual appeal of the Mavic 3
DJI engineers must have reasoned that tinkering with a tried-and-true design was not a good idea. The design idea of the Mavic 3 is very similar to that of the Mavic 2. Arms that fold, about the same weight (less than 900 grams), sensors all around for obstacle detection, and a camera on the front. The drone is sturdy, with no movement in the arm hinges.
However, if you look closely, you will see the differences with the M2 Pro. The camera module, for example, includes two cameras. One main camera for recording high-quality video and aerial photographs, as well as a secondary camera for bringing distant things closer. The arms have slimmed down and the props have become significantly longer. The obstacle detection sensors are now located on the corners, allowing for 360-degree vision. The top ventilation holes are brand new. The drone sits much higher on its legs when unfurled.

The Mavic 3 has obstacle detection sensors on the front, top, bottom, and back.
Aside from the nomenclature, there is no change in design between the ‘regular’ Mavic 3 and the Mavic 3 Cine. The latter version has the ability to shoot in ProRes, a format primarily used by professional editors. Because ProRes requires a substantially larger data throughput, DJI has supplied the Mavic 3 Cine with a 1TB SSD. In case you forget to install a microSD card, the standard Mavic 3 contains 8 GB of internal capacity.
DJI RC Pro
The controller that comes with the drone is determined by the version you choose. The basic version of the Mavic 3 and the Fly More Combo seem to use the same controller as the Mini 2, Air 2, and Air 2S. It’s a simple controller with two (detachable) sticks for control, a switch to choose between Cine, Normal, and Sport flying modes, a rotary wheel for the gimbal, a return to home button, an adjustable function button, and a button to switch between filming and shooting. And, of course, a button for starting a recording or taking a photo.
There is no display with current information, like with the Mavic 2 controller, and no rotary wheel to swiftly modify the aperture setting – a significant loss, as will be shown later. You place the phone in the top retractable hold. You’ll need to get a different holder if you wish to attach a (small) tablet. Personally, I use an iPad Mini.

The DJI RC-N1 remote controller is paired with an iPad Mini.
The controller included with the Mavic 3 Cine is even more comprehensive. In that instance, it is the RC Pro, the Smart Controller’s successor. The DJI RC Pro has a built-in display, eliminating the need to connect a phone or tablet. Furthermore, the RC Pro has additional controls for adjusting the zoom factor, such as a multipurpose 5-way button, pause button, and an extra rotating wheel.
DJI Mavic 3 drone accessories
Anyone who purchases the Fly More Combo – including me – will get a slew of extras in addition to the drone and controller. A carrying case, a set of ND filters (ND4, ND8, ND16, and ND32), three spare propellers, three batteries, a charging hub that charges the batteries one at a time, and a few extra sticks are included.
The charger contains a USB-C connection that may be directly connected to the drone (so it is possible to charge a battery while it is in the drone). Instead of merely a gimbal protector, you receive a strap-on attachment. The benefit is that the propeller ends are instantly protected. This shield also protects the somewhat prominent ‘eyes’ of the obstacle detection.

You will get a set of ND filters as part of the Fly More Combo.
DJI Fly app for the Mavic 3 drone
The DJI Fly app is used to operate the Mavic 3. The DJI Mini 2 was the first to include this app. It is totally redesigned software that seems to be particularly geared towards inexperienced users. Unfortunately, the various customization choices that DJI GO 4 provided to Mavic, Phantom 4, and Inspire 2 users have only been reinstated to a limited level in DJI Fly.
You will be notified of any firmware upgrades on the DJI Fly starting screen. In addition, the home screen provides access to the Academy, an online learning environment where you can learn more about flying your drone and shooting videos. Album allows you to browse recordings linked to your phone, SkyPixel takes you to DJI’s online photography platform, and Profile gives you access to your personal profile, including flight records.
When the drone and controller are turned on, the primary screen of DJI Fly displays the live camera view. The current flight mode and any alerts are shown in the upper left corner. The remaining flying time and battery status, as well as the GPS status and radio connection signal strength, are shown in the upper right corner. You may also reach the advanced options menu from here. At the lower left, you can see the ‘radar,’ which displays the drone’s location as well as its current height, distance, and speed. The camera settings are located in the bottom right of the screen. Finally, on the right side, you can see the camera controls, including the binoculars symbol, which allows you to zoom in and out.

The DJI Fly app’s primary interface.
Those who are familiar with the DJI GO 4 app will require some time to get acquainted with the DJI Fly app. You will often have to search, particularly when it comes to sophisticated camera settings and access to the drone’s security settings, such as maximum flying height and obstacle detection operation. However, after a few flights, you quickly get the idea of the software, though I still often make mistakes while tweaking the camera settings.
Now, I must state unequivocally that you cannot get everything out of the drone with the DJI Fly app in its present form. Consider fine-tuning the flying behavior (sensitivity of the sticks), or visual properties such as contrast, color, and sharpness may be adjusted as needed. Personally, I think it is inexcusable that the stock controller lacks an LCD display that shows the major telemetry. A professional controller and a more comprehensive app are expected with a drone that costs more than 2,000 dollars.
DJI Mavic 3 flight efficiency
Even though the Mavic 3 seems familiar, flying a new drone is always interesting. Of course, you don’t go out until you’ve loaded the latest software, which is a simple process using the DJI Fly app. When it comes to charging the batteries, you must be patient: the charging hub charges the batteries one by one, which seems to take longer than the preceding Mavic 2. Fortunately, you can charge the controller and the batteries at the same time with the provided USB-C connector.
When I arrive at one of my favorite flying locations, I notice that the Mavic 3 does not request a compass calibration, despite the fact that I know there is some metal in the ground here. Simply wait for the GPS fix and take off right away. Despite a strong breeze — I estimate wind force B4 – the drone remains stable. The low noise generation and somewhat lower ‘pitch’ of the buzz are striking. This is a big benefit!

The Mavic 3 can fly in strong winds and is rather silent.
The Mavic 3 behaves in a different way than my Mavic 2. In my perspective, it’s a little more forceful. I have greater difficulty making tiny steering motions – however, this may require some practice. Even against the wind, the drone can be readily steered back and forth. The controller fits comfortably in the hand, and the camera picture is sent to the iPad Mini through O3+ transmission technology.
There are three flying modes to select from Cine, Normal, and Sport. The Cine mode guarantees that the drone responds to steering motions less suddenly, and the maximum speed is also somewhat reduced. The Tripod mode, which I often used with the Mavic 2, is no longer available. The Cinematic mode helps to compensate for this, although it cannot be fine-tuned at the present. Perhaps it will be included in a subsequent version of the DJI Fly app.
I can only say that the flight was unusually long. I have the impression that the 5,000 mAh battery will last forever. Even on a later test fly with wind force B5, I had the drone off the ground for at least 35 minutes on every test trip. I even believe that three batteries are plenty for most shooting days (with the Mavic 2 I always took five batteries with me ).
Detection of Obstacles with the M3
A new obstacle detection system is included with the Mavic 3. To that purpose, six sensors with fisheye lenses have been strategically placed on the front, back, and bottom. In addition, the Mavic 3 boasts two additional sensors, one on top and one on the bottom. The Mavic 3’s improved sensor system allows it to scan the entire surrounding area for obstacles. Flying sideways with the obstacle avoidance activated is also an option. The Mavic 2 included sideways sensors as well, however, they only operated in Tripod mode. It’s worth noting that the sensors only operate if there’s enough light. The technology turns itself off in the dark.
During my testing, it looked that the obstruction detection is rather basic. In the event of an obstruction, you may instruct the drone to either stop or fly around it. This setting was tested on a few pillars under the Scheveningen pier. As you can see in the video below, the drone just sees the pillar at the last second and then swerves around it. But I didn’t dare to fly towards a pillar at a much higher speed.

The new bottom sensors have an extra disadvantage. That becomes clear after the first test round when I want to land the drone. I’m accustomed to manually ‘plucking’ the drone out of the air (although that is not recommended). But the Mavic 3 isn’t interested in that. The underneath sensors are unyielding: the drone must and will land on a level surface. Something to consider if you want to land on a sandy or uneven area. To begin with, if you wish to land on a tiny boat, a hand catch is often the only possibility. Alternatively, you may turn off the sensors, which is also an option.
Unfortunately, DJI has yet to deploy the promised Advanced Pilot Assistance System version 5. (APAS). ActiveTrack 5 is not yet available either. In that regard, it is right that obstacle detection has not yet been improved. This should change with a future firmware upgrade, however, these features have yet to be tested.
AirSense is another safety feature available on the Mavic 3. Based on ADS-B In, the drone may notify you of other air traffic outfitted with an active ADS-B Out signal. I also got a warning on a test flight. However, it proved out to be a passenger airliner flying far above. I’m not sure what this has to do with me. Furthermore, not all airplanes in our territories have an ADS-B transponder. So don’t depend only on this function!
Specifications and performance in video
The most noticeable difference between the Mavic 3 and previous models is, of course, the new camera. Or, more accurately, cameras, since the Mavic 3 has two. One ‘main camera’ with a 4/3″ sensor (also called micro four thirds) and a ‘secondary camera’, with a smaller 1/2″ sensor. DJI seems to have attempted to merge the Mavic 2 Pro and Mavic 2 Zoom.
The primary camera provides the greatest results. Filming resolutions include 1080p HD (1920 x 1080 pixels), 4K (3840 x 2160 pixels), and 5.1K (5120 x 2700 pixels). DCI 4K, having a resolution of 4096 x 2160 pixels, has been added. The frame rate may reach 200 frames per second in 1080p HD, 120 frames per second in 4K, and 50 frames per second in 5.1K. In terms of codec, you have the option of using H.264 or the new H.265. In the latter scenario, a stronger compression will be advantageous. The bit rate is 200 Mbps, which is twice as fast as the old Mavic 2 Pro. The viewing angle is 84-degrees. Hasselblad technology is used for the colors.
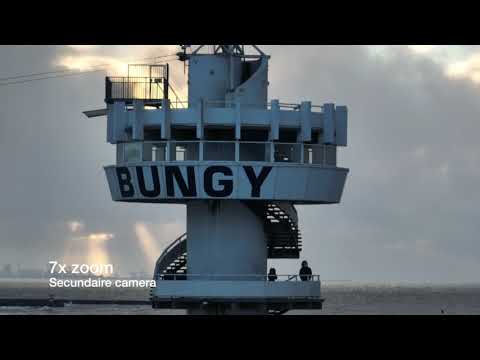
The secondary camera has a lens with a focal length of 162 mm. This equates to a zoom factor of 7 when compared to the primary camera. The entire zoom range achieved by digitally zooming in is no less than 28x. The secondary camera features a 1/2″ sensor. The highest resolution is 4K, and you’re limited to 30 frames per second with no D-log option.

The camera module of the Mavic 3 has two different sensors.
The initial images I took with the main sensor seem to be promising. There is a lot of detail, nuanced colors, and no issues with color cast or vignetting, about which I noticed many complaints on forums. The photographs and videos are of extremely great quality, especially when shot in 5.1K D-log, with lots of flexibility for post-processing. The maximum bandwidth has been increased to 200 Mbps, which is twice as fast as the Mavic 2.
The video above was shot in 5.1K 10-bit D-log H.265. This is the best option for getting the most out of the sensor. Colors and contrast are ‘flattened’ when recording in D-log to give as much dynamic range as feasible. Colors may be recovered during processing by using a technique known as lut. You may get it from DJI. When you shoot in D-log, I don’t observe any barrel-shaped distortion, as I saw with the Mavic 2. One downside is that you cannot use DJI Fly to load a preview lut when shooting in D-log. So you’re staring at really flat hues, and you have no clue what the overall outcome will be.

Another video, but this time in 4K, 8 bit, and regular colors. The imagery captured by the drone is instantly useful and does not need to be color-graded, as with D-log. I found that the horizon periodically skews when editing the video. The ability to create slow-motion pictures at up to 120 frames per second in 4K is appealing. In addition, a crop factor is used, which reduces the angle of view somewhat.

Personally, I believe the Mavic 3’s wide-angle of vision (84 degrees) is a travesty. Despite the fact that there is no distortion, everything is incredibly broad. The Mavic 2 featured a viewing angle of 77 degrees, which increased to 54 degrees in HQ mode. Even though it was impossible to shoot in D-log, it was my favorite. I had hoped that the Mavic 3 would have an HQ mode, however, that is not the case.
By modifying the purpose of the Fn button, you may compensate for the absence of a rotary wheel to adjust the aperture. For example, you can increase your aperture one stop with one push and lower it one-stop with two presses.
If you purchase the Cine version of the Mavic 3, you may save video recordings in ProRes 422 HQ. Apple created this codec, which employs substantially less picture compression. The benefit is that the footage may be processed more effectively in a professional workflow. The drawback is that ProRes demands much more memory space. A few seconds of video rapidly fills up a few GB.
Zooming in on a scene
With the main camera, you may digitally zoom in up to 4x when shooting. To do so, go to the ‘Explore’ mode by clicking on the binoculars icon. The problem is that picture quality suffers and you can’t use complex video settings: you’re limited to 4K 30 fps. When you wish to zoom in more than four times, the Mavic 3 switches to the secondary telephoto camera. It has a zoom range of 7x to (again, all digital) 28x.
In reality, 2x zoom on the primary sensor and 7x zoom on the telephoto sensor seem to provide the best results. However, it is not suitable for professional video production, in my view. You can already observe a loss of quality at 2x zoom, but it gets worse: you’re stuck with 4K 30 fps with a standard color profile. Although the secondary camera’s 7x zoom produces quite acceptable images, you’re still limited to 4K 30 fps. As a result, combining it with other videos captured at 25 fps D-log, for example, is challenging.
I’m hoping DJI will fix this in a future firmware release. For example, I’d want to see the ability to zoom 1.5x on the primary sensor while preserving setting settings, thus restoring the Mavic 2’s HQ mode. And the 7x zoom at 4K may be beneficial if you can then pick different frame rates and D-log.
Specifications and performance in photography
The main camera shoots at a resolution of 20 megapixels (5280 x 3956). The sensor is much bigger than that of the Mavic 2 Pro, which improves light sensitivity. The focal length is 24mm equivalent, resulting in an 84-degree field of view. The aperture can be adjusted from f/2.8 to f/11.

Images may be saved in jpg or jpg + raw format, in 4:3 or 16:9 aspect ratio. In addition to a single photo, bracketing (exposure bracketing) with 3 or 5 shots is an option. Interval photography is another option. Unfortunately, there is no option for hyperlapse, and panoramic photographs are not yet featured (these functions will come later in a firmware update). For now, if you want to create a pano, you’ll need to create the individual photographs yourself and then combine them in a program like Photoshop.

The images are of great quality, with minimal distortion at the corners and a wide dynamic range (particularly in RAW), but the angle of view is, in my opinion, too wide. In actuality, it turns out that at ISO 800, the sensor becomes a little more challenging, and picture noise becomes more noticeable – but the photographs are still passable.

With clouds, just after sunset. ISO 800, right from the camera jpg.
In the case of photography, you may also use the ‘Explore’ option to zoom in. The initial 4x zoom is performed by digitally zooming in on the primary camera picture. Following then, the camera is switched to the secondary camera, which has a zoom factor of 7. You may get 28x zoom by digitally zooming even further.

A shot taken with the secondary camera (zoom factor 7), in jpg format, with a resolution of 12 megapixels.
Unfortunately, the zoom feature is ineffective for professional work. You lose the ability to shoot in RAW right away. Digital zooming on the primary sensor is never good for picture quality, so you may as well crop afterward. The secondary sensor takes images with a resolution of 12 megapixels and a magnification of 7x, but no more. In any event, the telescopic camera’s 1/2″ sensor is much less brilliant than the main camera’s.
DJI Mavic 3 drone review conclusion
My expectation was that the Mavic 3 would combine the greatest features of the Mavic 2 Pro and Mavic 2 Zoom. However, that, in my judgment, was only partly effective.
The main sensor’s picture quality is excellent, particularly in 5.1K D-log, however, the zoom feature is ineffective for professional video production. This might be improved in future versions, but only time will tell. I would have preferred an HQ mode similar to the Mavic 2, with a modest crop factor and 10-bit D-log. The secondary camera is only relevant to me as an image producer if it has more frame rate options and color profile customization choices.
Furthermore, the fact that the drone comes with basic software like the DJI Fly app is totally unacceptable. You paid a lot of money for the equipment, thus you anticipate at least the capabilities that the DJI GO 4 provided. Not to mention the other features that are still lacking, such as APAS 5, hyperlapse, and panoramic photography. DJI, in my view, promoted the Mavic 3 too soon.
My opinion is that DJI included the additional camera with the intention of using the Mavic 3 for inspection work. That is a decent starting point, but the primary camera lacks a mechanical shutter, making the Mavic 3 less appropriate for mapping and photogrammetry applications. The lack of a defined direction has prevented the Mavic 3 from being the ideal tool for aerial filmmakers and photographers, as well as the ultimate inspection and mapping drone. It is presently undecided.
Finally, there is one more elephant in the room that has to be addressed. Despite the fact that the DJI Mavic 3 weighs slightly under 900 grams, it lacks a C1 label. This means you can only operate the drone in Open categories A2 (as long as you stay 50 meters away from people) and A3. After January 1, 2023, you may only operate the Mavic 3 in Open category A3, unless DJI obtains a C1 certification and has it retrospectively assigned to Mavic 3s that have already been sold. There are no promises in this respect at the moment.
Note: DJI has said that a firmware upgrade will be released in January 2022 that will include the missing functionalities. There may also be other camera configuration possibilities.
Pros:
- The main camera produces high-quality images.
- Lengthy flying duration
- Reasonably quiet
- All-around obstacle detection
Cons:
- The zoom feature of the second camera is unusable for professional photography and videography
- The DJI Fly app’s functionality and configuration choices are very limited.
- Horizon sometimes skews
- No aperture dial on the RC-N1 controller.
- The controller is quite simple (unless you buy the Cine edition)
- There is no Cx label.


Get your Part 107 Certificate
Pass the test and take to the skies with the Pilot Institute. We have helped thousands of people become airplane and commercial drone pilots. Our courses are designed by industry experts to help you pass FAA tests and achieve your dreams.

Stay in touch!
If you’d like to stay up to date with all the latest drone news, scoops, rumors, and reviews follow us on Twitter, Facebook, YouTube, Instagram, or… Subscribe to our Daily Drone News email.*
amzn_assoc_tracking_id = “kesteloo-20”;
amzn_assoc_ad_mode = “manual”;
amzn_assoc_ad_type = “smart”;
amzn_assoc_marketplace = “amazon”;
amzn_assoc_region = “US”;
amzn_assoc_design = “enhanced_links”;
amzn_assoc_asins = “B08NQD4FBW”;
amzn_assoc_placement = “adunit”;
amzn_assoc_linkid = “7b5b73d36ba4e61bacde96fa21ee3402”;
FTC: DroneXL.co uses affiliate links that generate income. * We do not sell, share, rent out or spam your email, ever. Our email goes out on weekdays around 5:30 p.m.
This article first appeared on Dronewatch and is written by Wiebe de Jager who is also a DroneXL contributor.
Discover more from DroneXL.co
Subscribe to get the latest posts sent to your email.
Check out our Classic Line of T-Shirts, Polos, Hoodies and more in our new store today!

MAKE YOUR VOICE HEARD
Proposed legislation threatens your ability to use drones for fun, work, and safety. The Drone Advocacy Alliance is fighting to ensure your voice is heard in these critical policy discussions.Join us and tell your elected officials to protect your right to fly.
Get your Part 107 Certificate
Pass the Part 107 test and take to the skies with the Pilot Institute. We have helped thousands of people become airplane and commercial drone pilots. Our courses are designed by industry experts to help you pass FAA tests and achieve your dreams.

Copyright © DroneXL.co 2026. All rights reserved. The content, images, and intellectual property on this website are protected by copyright law. Reproduction or distribution of any material without prior written permission from DroneXL.co is strictly prohibited. For permissions and inquiries, please contact us first. DroneXL.co is a proud partner of the Drone Advocacy Alliance. Be sure to check out DroneXL's sister site, EVXL.co, for all the latest news on electric vehicles.
FTC: DroneXL.co is an Amazon Associate and uses affiliate links that can generate income from qualifying purchases. We do not sell, share, rent out, or spam your email.


That duality of very high points and then major facepalms is the only fitting conclusion.
Price is lot higher than in predecessors and while you get very strong performing drone, remote is dumbmote with less features/functions than in predecessors.
When talking about this price drone standard remote should simply have basic “telemetry” available in case of app/phone/tablet has hiccup.
And main camera is definitely superb and that second zoom lens camera would be handy for getting close ups of small things in inspections, or when you just can’t get close.
But at the same time it’s completely lame that you can’t get RAW from second camera!
Also there’s dumbed down DJI Fly app with less functionality and some very important basic things like control stick response curve adjustment completely unavailable.
Again Cx certification missing is simply thing which is out of DJI’s control.
There the fault is in bureuacrats who have wasted multiple years without getting specification for certfiying ready.
If they wanted to impress us they’d release an actual Mavic 3 “Pro” with fully functional Go app, forget the zoom and give us that M43 with a larger aperture for even better lowlight.. Just one big camera module.. And if want to dream big… Make the Mavic the size of the Autel and take advantage of that size with a even bigger battery and give us a APSC or full frame sensor.. It can be done and cooled with vents.. If you can put a M43 and zoom module on a small Mavic 3 you can put a larger camera on an Autel sized Mavic.. If we wanted a small drone.. we’d buy a mini or a air 2s… Give us pros the max camera.. I’d pay $4,000+ for THAT